
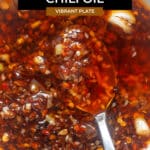


Make your own Homemade Garlic Chili Oil in just 10 minutes! This easy, flavor-packed sauce is the perfect spicy topping, ideal for noodles!
If there’s one condiment that can instantly transform your meals from good to can’t-stop-eating-this great, it’s a bold, aromatic Homemade Garlic Chili Oil.
This simple yet powerful recipe is a pantry staple in many Asian cuisines. And once you make your own, you’ll understand why it deserves a permanent spot in your fridge (and on your table).
What makes this chili oil so special?
It’s all about balance: the deep nuttiness of toasted garlic, the mellow heat from chili flakes, and that unmistakable sesame aroma that lingers just enough to keep things interesting.
With just a handful of everyday ingredients, you’ll create a spicy, savory, and ultra-versatile condiment that works on everything, from noodles, dumplings, and stir-fries to avocado toast and even roasted veggies. Yes, it’s that good.
One of the best parts? It’s totally customizable. Whether you like it mild with Korean gochugaru or fiery with Sichuan chili flakes, you can adjust the heat and aromatics to suit your taste. Plus, this version uses simple pantry ingredients like garlic, soy sauce, and vinegar; no fancy tools or hard-to-find spices required.
Beyond the flavor bomb it delivers, making garlic chili oil at home means you know exactly what’s going into it: no preservatives, no additives, just real flavor. And thanks to the garlic and spring onions, you’ll get that crave-worthy crunch with every spoonful.
If you are looking to upgrade your weeknight dinners, this recipe is foolproof, fast, and ridiculously satisfying. Trust me, once you try it, you’ll start finding excuses to drizzle it on everything.
Ready to make magic in a jar? Let’s get into it.
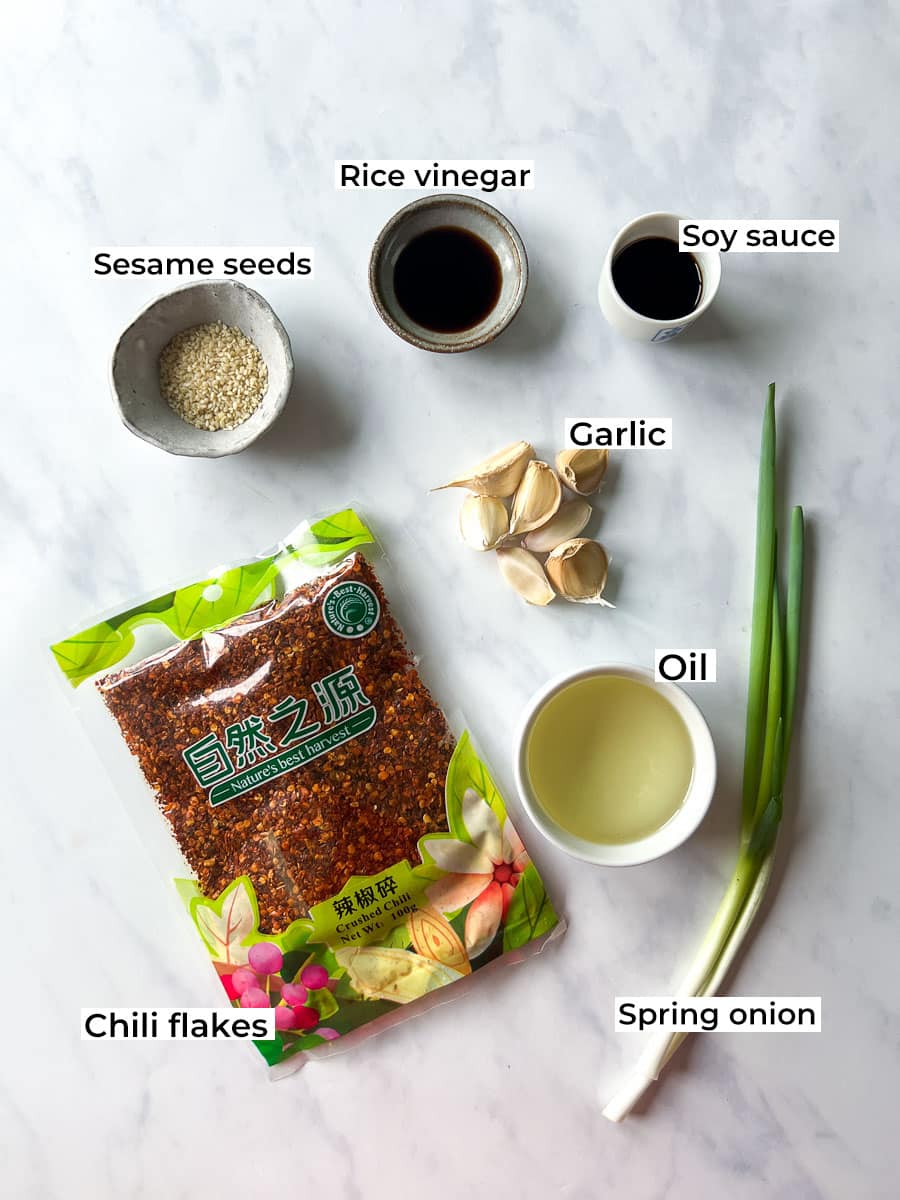
Homemade Garlic Chili Oil Ingredients
Here’s everything you’ll need to make this delicious chili oil, along with a few quick tips to make it even better:
Garlic: This is the key to adding bold, aromatic flavor. Finely mince or even grate it for an extra-intense infusion. If you prefer a mellow garlic flavor, lightly toast it in oil first to soften the bite.
Chili flakes: This is where the heat comes in! Adjust the amount based on your spice tolerance. For mild to medium heat, use Korean gochugaru (coarse chili flakes) for a rich, smoky flavor. For more heat, use Sichuan chili flakes or crushed red pepper.
Spring onions: The white part is more pungent and aromatic, making it perfect for infusing into the oil. Thin slicing ensures it crisps up nicely when the hot oil hits.
Sesame seeds: Add a subtle nutty crunch and toasty aroma. You can use white or black sesame seeds. Lightly toast them in a dry pan beforehand for deeper flavor, or let the hot oil toast them in the bowl.
Neutral oil: This is your base. Use an oil with a high smoke point and neutral flavor so it doesn’t overpower the aromatics, like canola, grapeseed, or sunflower oil. Avoid olive oil, as its flavor is too strong and it can burn easily.
Soy sauce: Adds umami depth and saltiness. Low-sodium soy sauce works fine, too. If gluten-free, opt for tamari.
Dark rice vinegar: Balances out the richness with a touch of tang. Dark rice vinegar adds a more complex, malty depth, but regular rice vinegar will also do the trick.
Toasted sesame oil: Just a small drizzle brings a rich, nutty, unmistakable flavor that ties everything together. Use it at the end rather than cooking it to preserve its delicate taste.
How to make Homemade Garlic Chili Oil
Ready to level up your Garlic Chili Oil game? Here’s the step-by-step with all the juicy tips and tricks to get that bold, sizzling flavor just right – crispy garlic, perfect heat, and all the good stuff!
Prepare the flavor base
In a heatproof bowl or glass jar (something that can withstand hot oil), add the following:
- chili flakes
- finely minced garlic
- thinly sliced white parts of a spring onion
- sesame seeds
If you want a slightly milder garlic bite, you can lightly sauté the garlic before adding it to the bowl. However, pouring the hot oil directly over raw garlic gives it that signature crisp edge and strong flavor.
Heat the oil
Pour ½ cup of neutral oil into a small saucepan. You can use canola, grapeseed, sunflower, or avocado oil for this part.
Set it over medium-low heat and warm it for about 2–3 minutes, until heated. You’re aiming for a temperature of around 180–190°C (350–375°F). You can check the temperature with a thermometer, but if you don’t have it, just drop a slice of spring onion into the oil; it should sizzle gently, not burn. The visual sizzle test works well, just be cautious and don’t let the oil smoke.
Infuse the aromatics
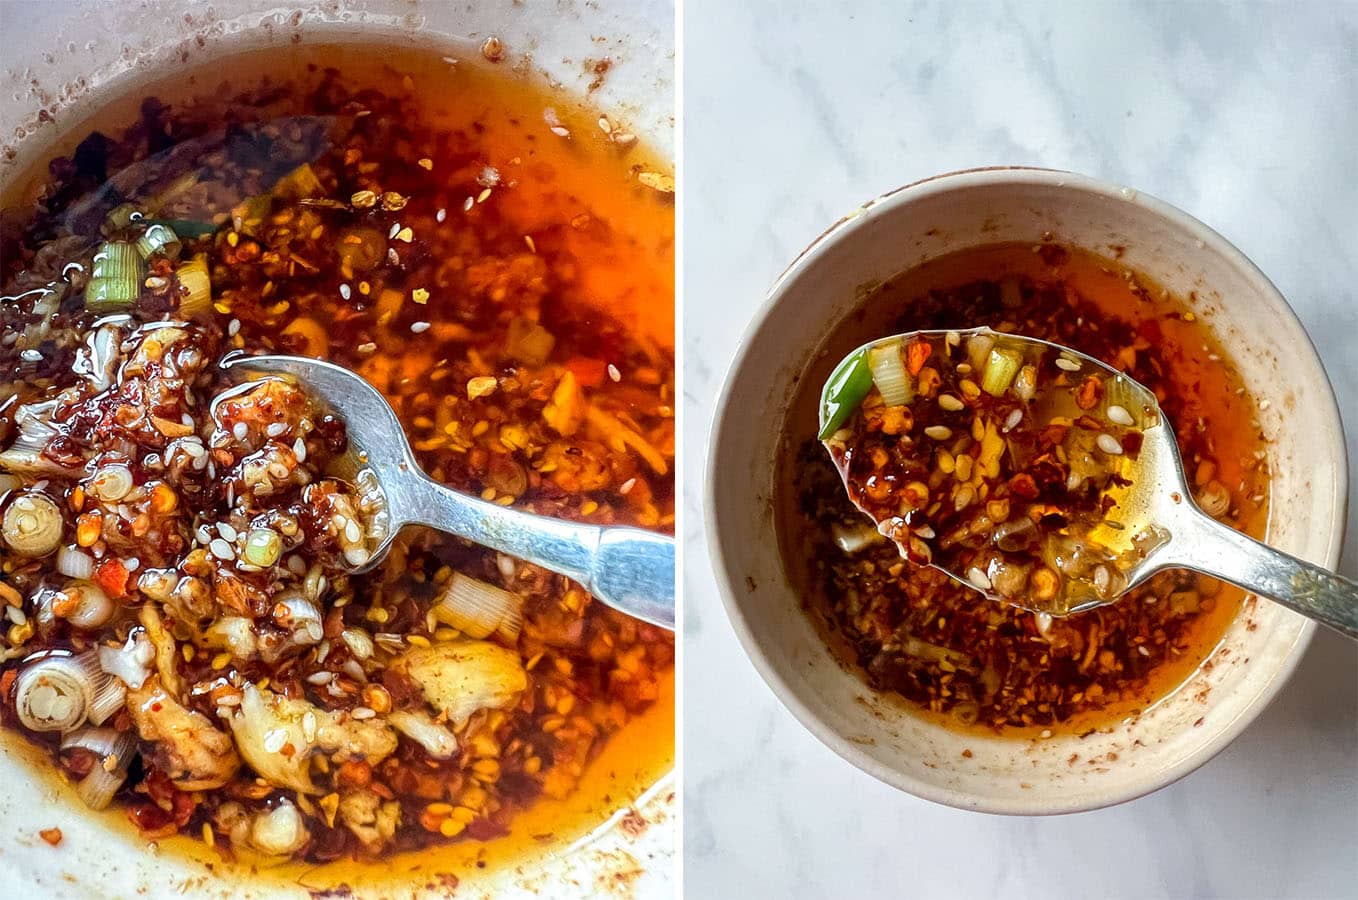
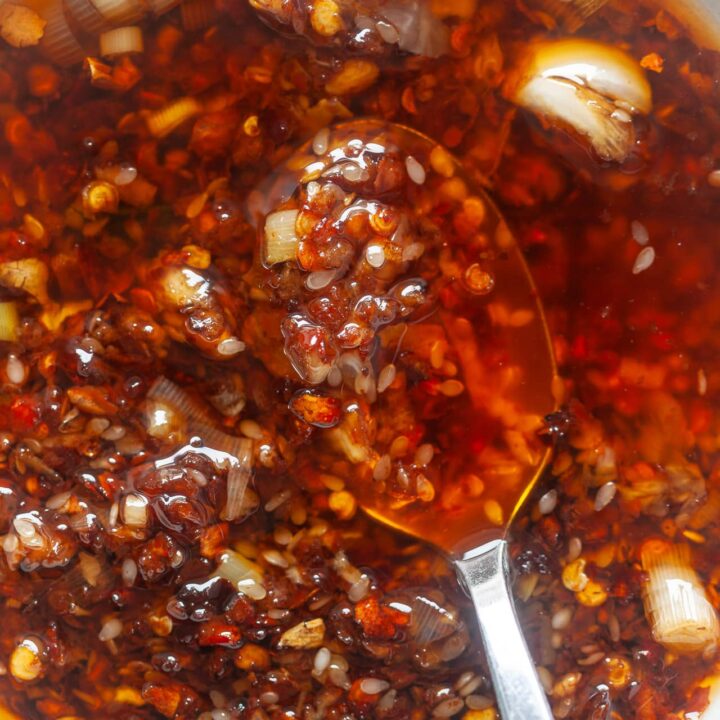
Once your oil reaches the right temperature, carefully pour it directly over the chili-garlic mixture in your bowl or jar.
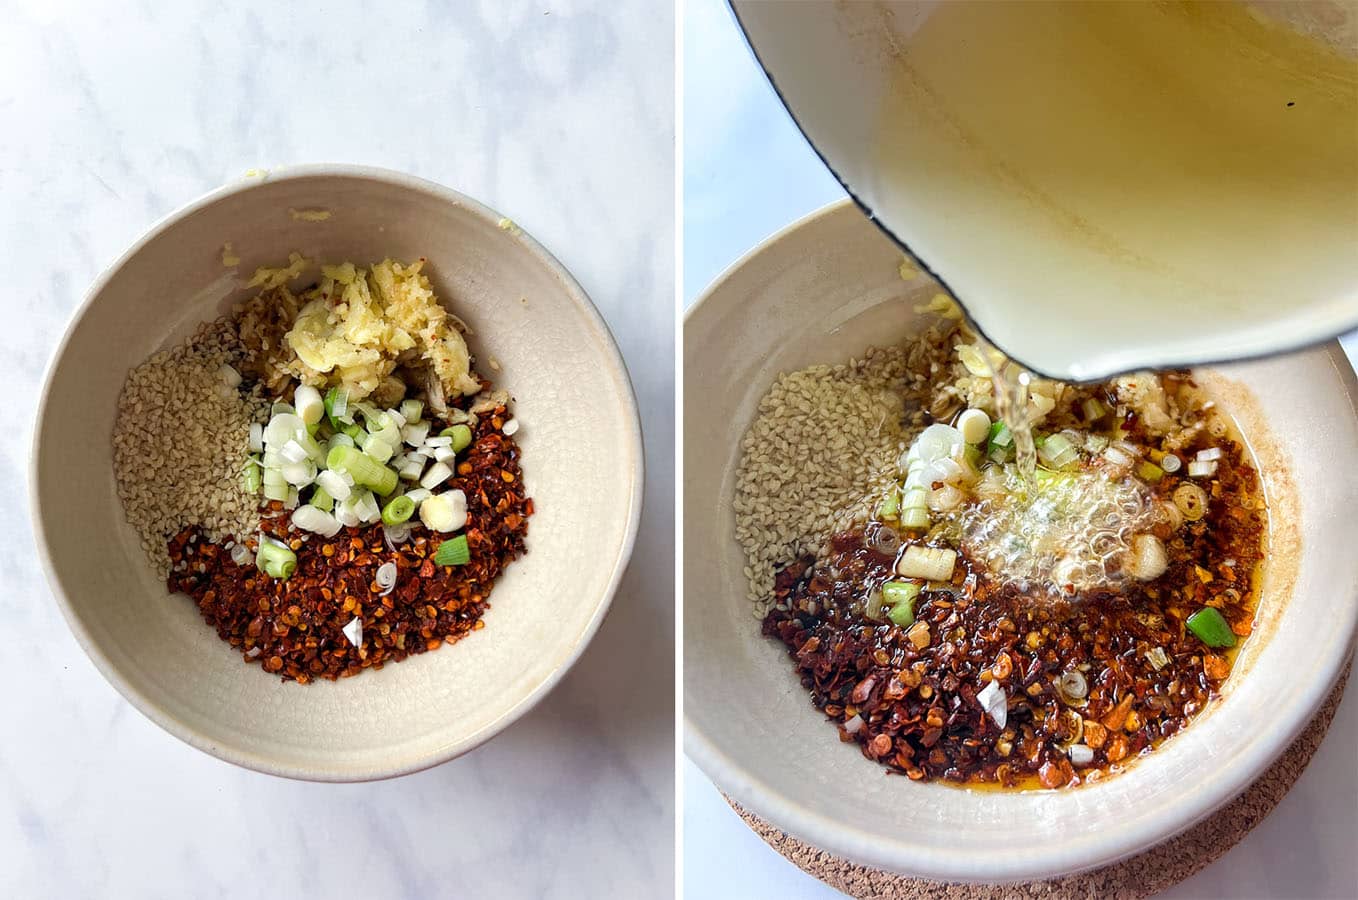
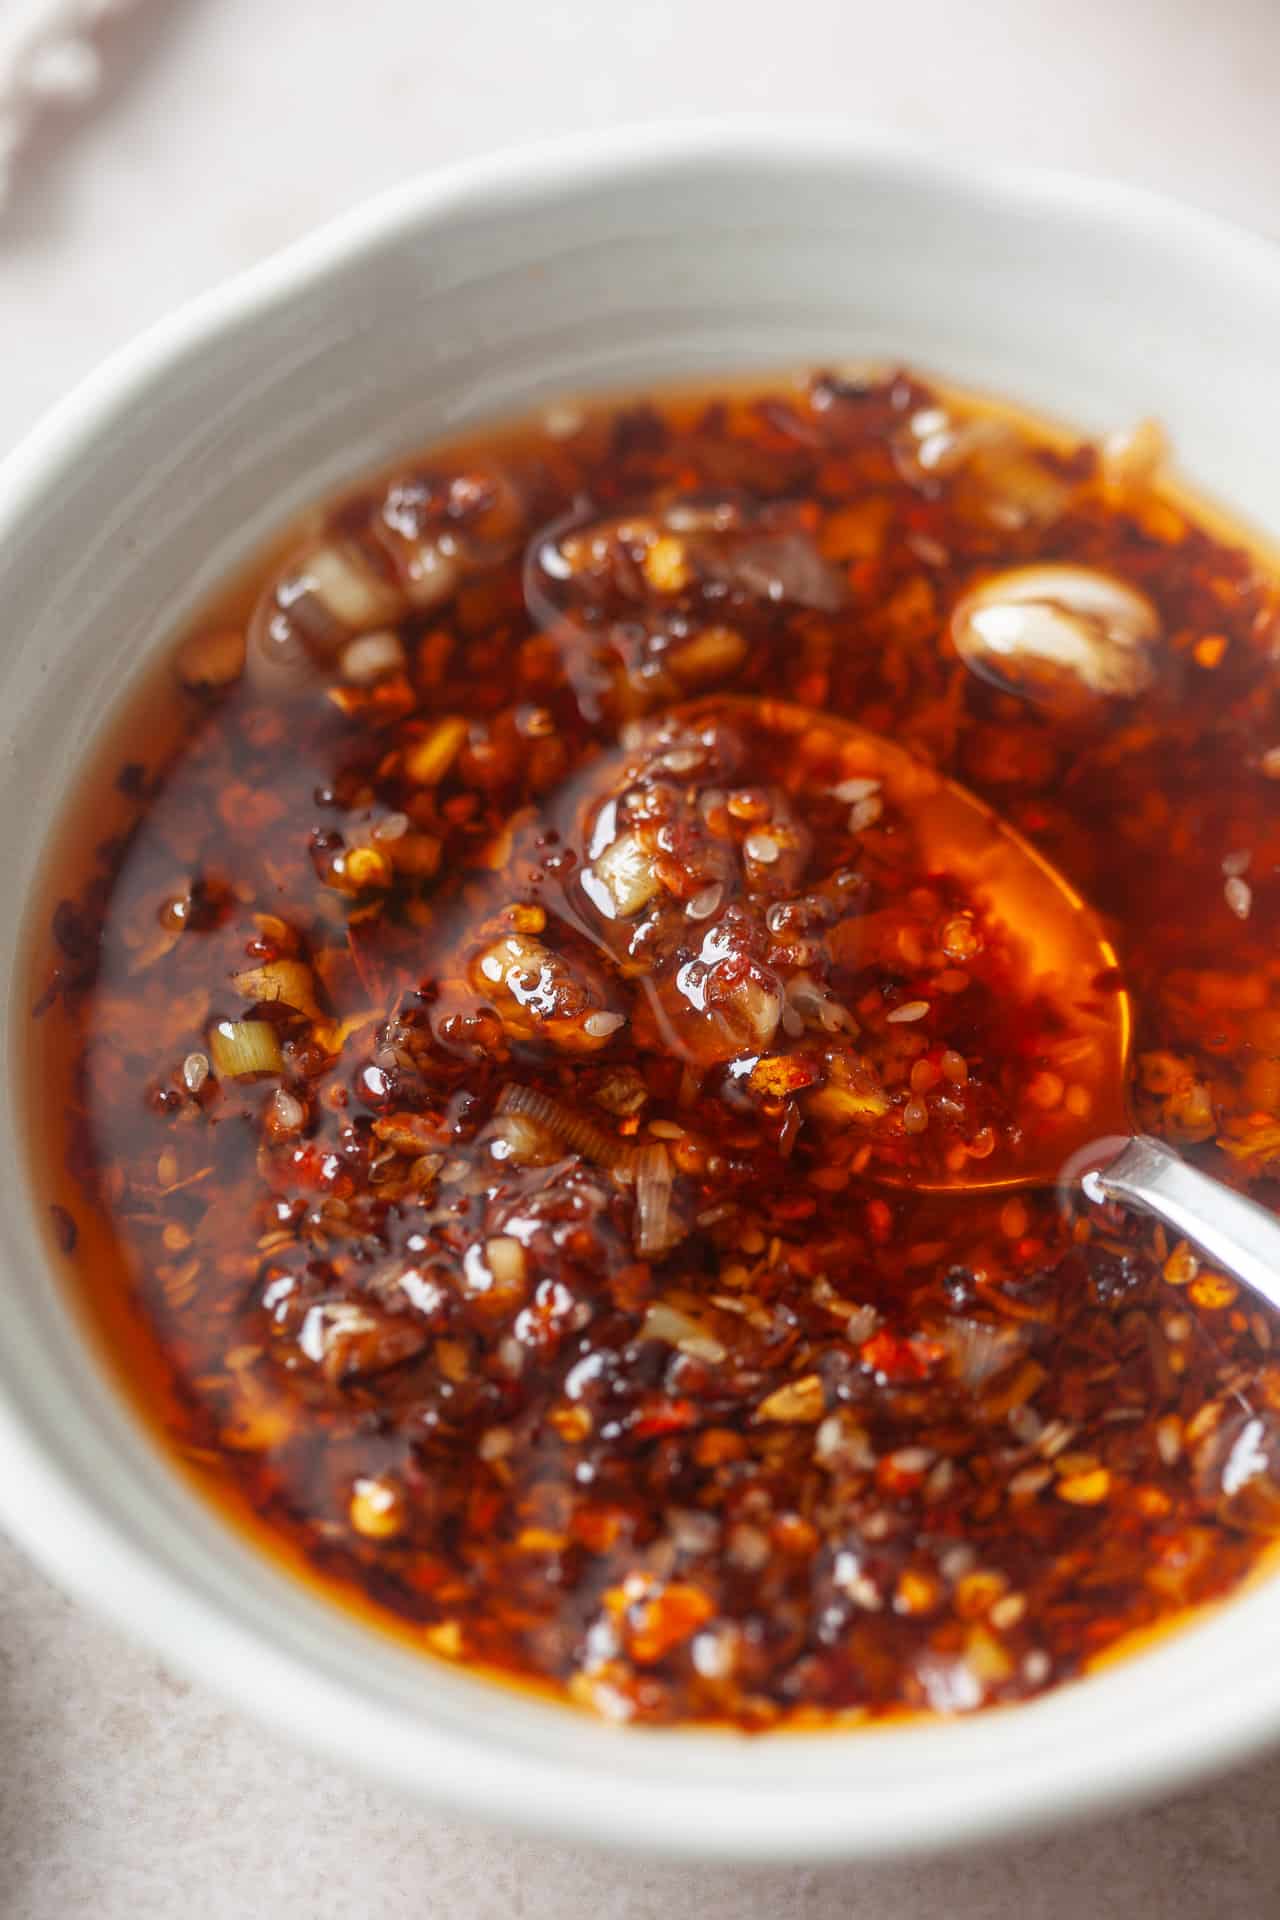
It should bubble and sizzle instantly – this is exactly what you want. The hot oil is flash-frying the garlic, chili flakes, spring onions, and sesame seeds, bringing out deep, toasted flavors.
Be cautious – hot oil is no joke! Pour it slowly and stand back slightly when pouring.
Gently stir the mixture after pouring to ensure even cooking and prevent clumping.
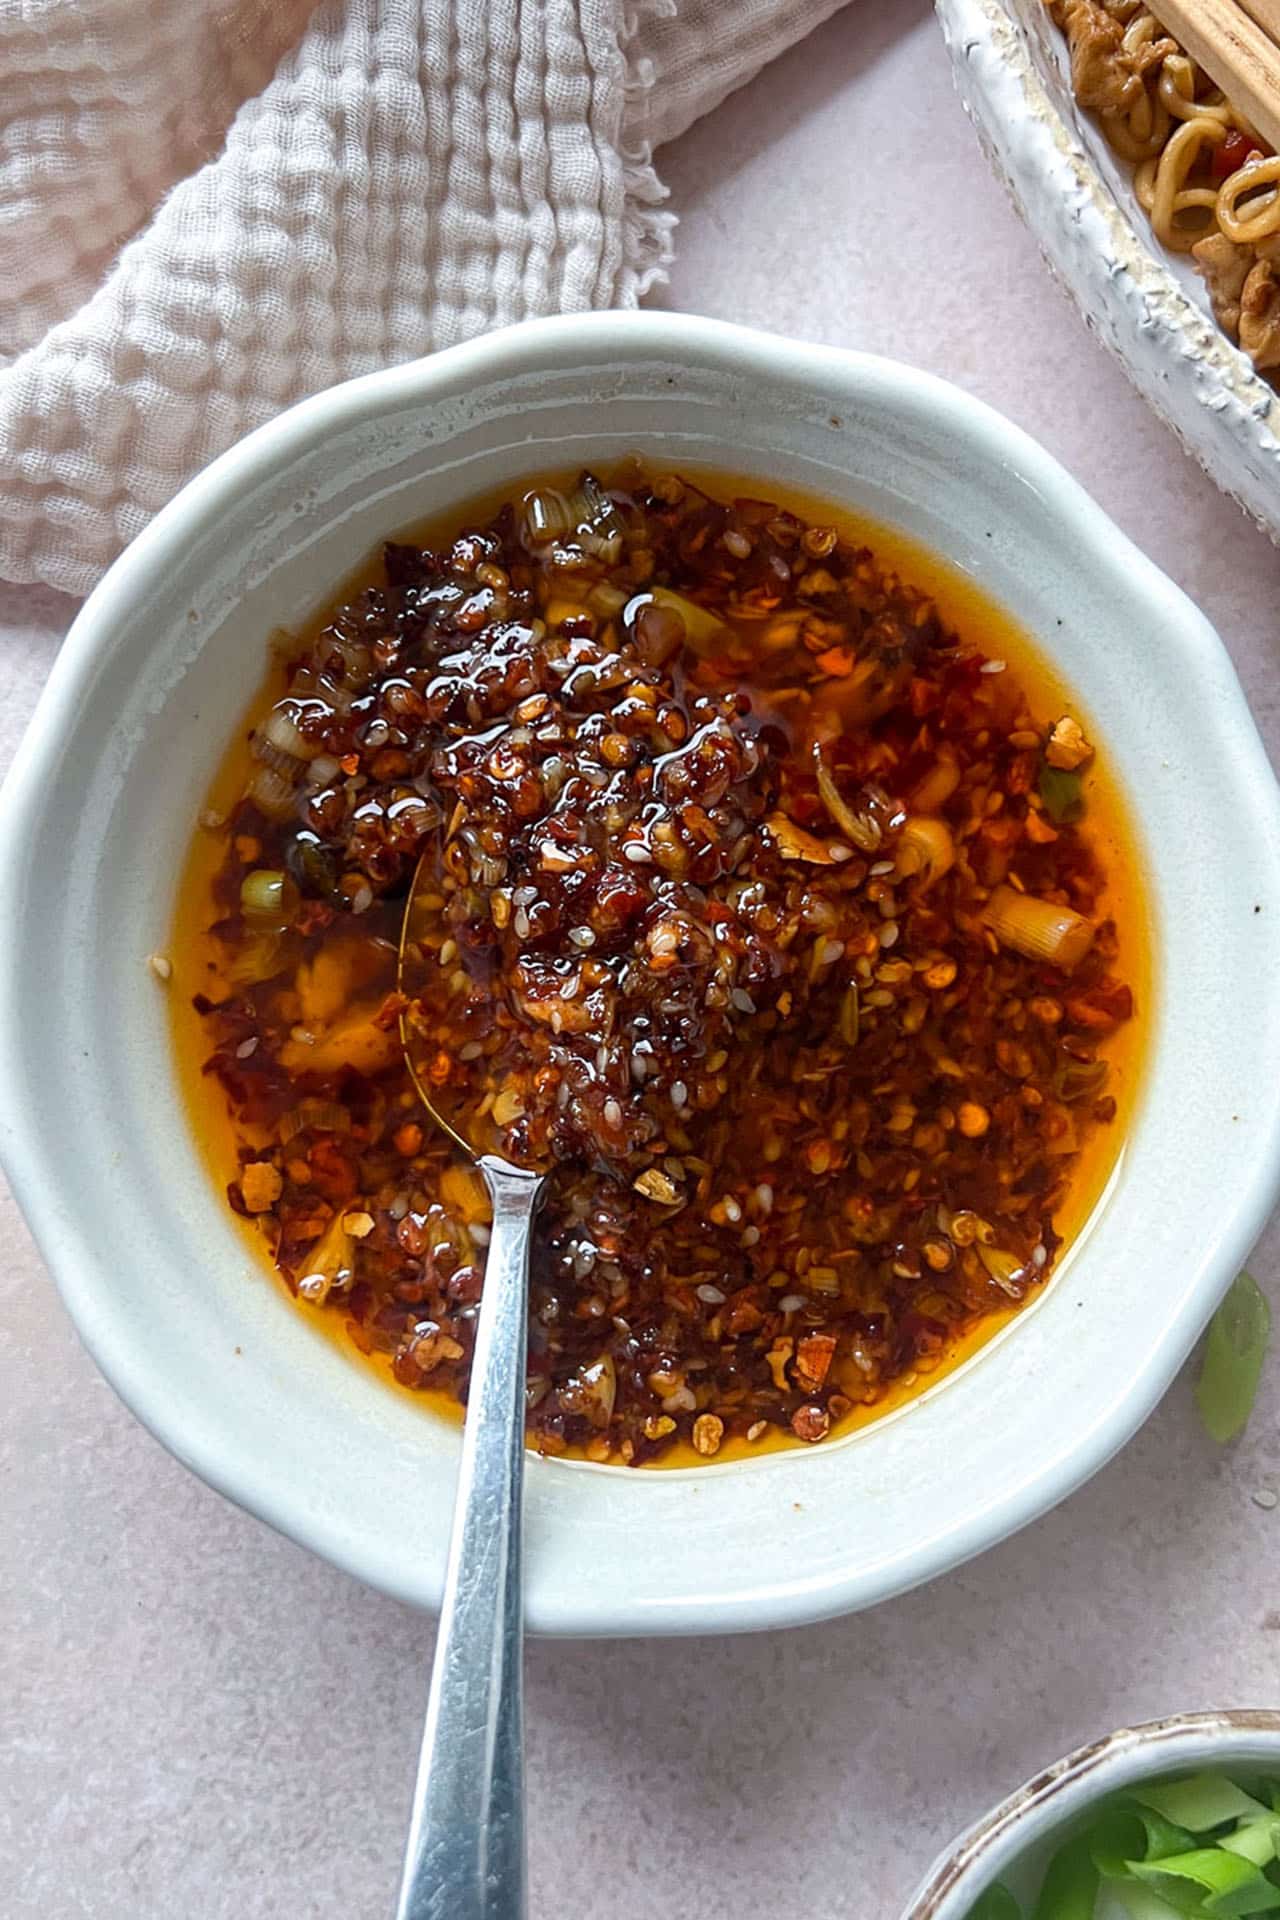
Season and finish
Once the sizzle calms down (usually after 15–30 seconds), stir in the soy sauce, rice vinegar, and add a drizzle (about 1 tsp) of toasted sesame oil.
These ingredients add umami, tang, and that rich nutty aroma to your chili oil.
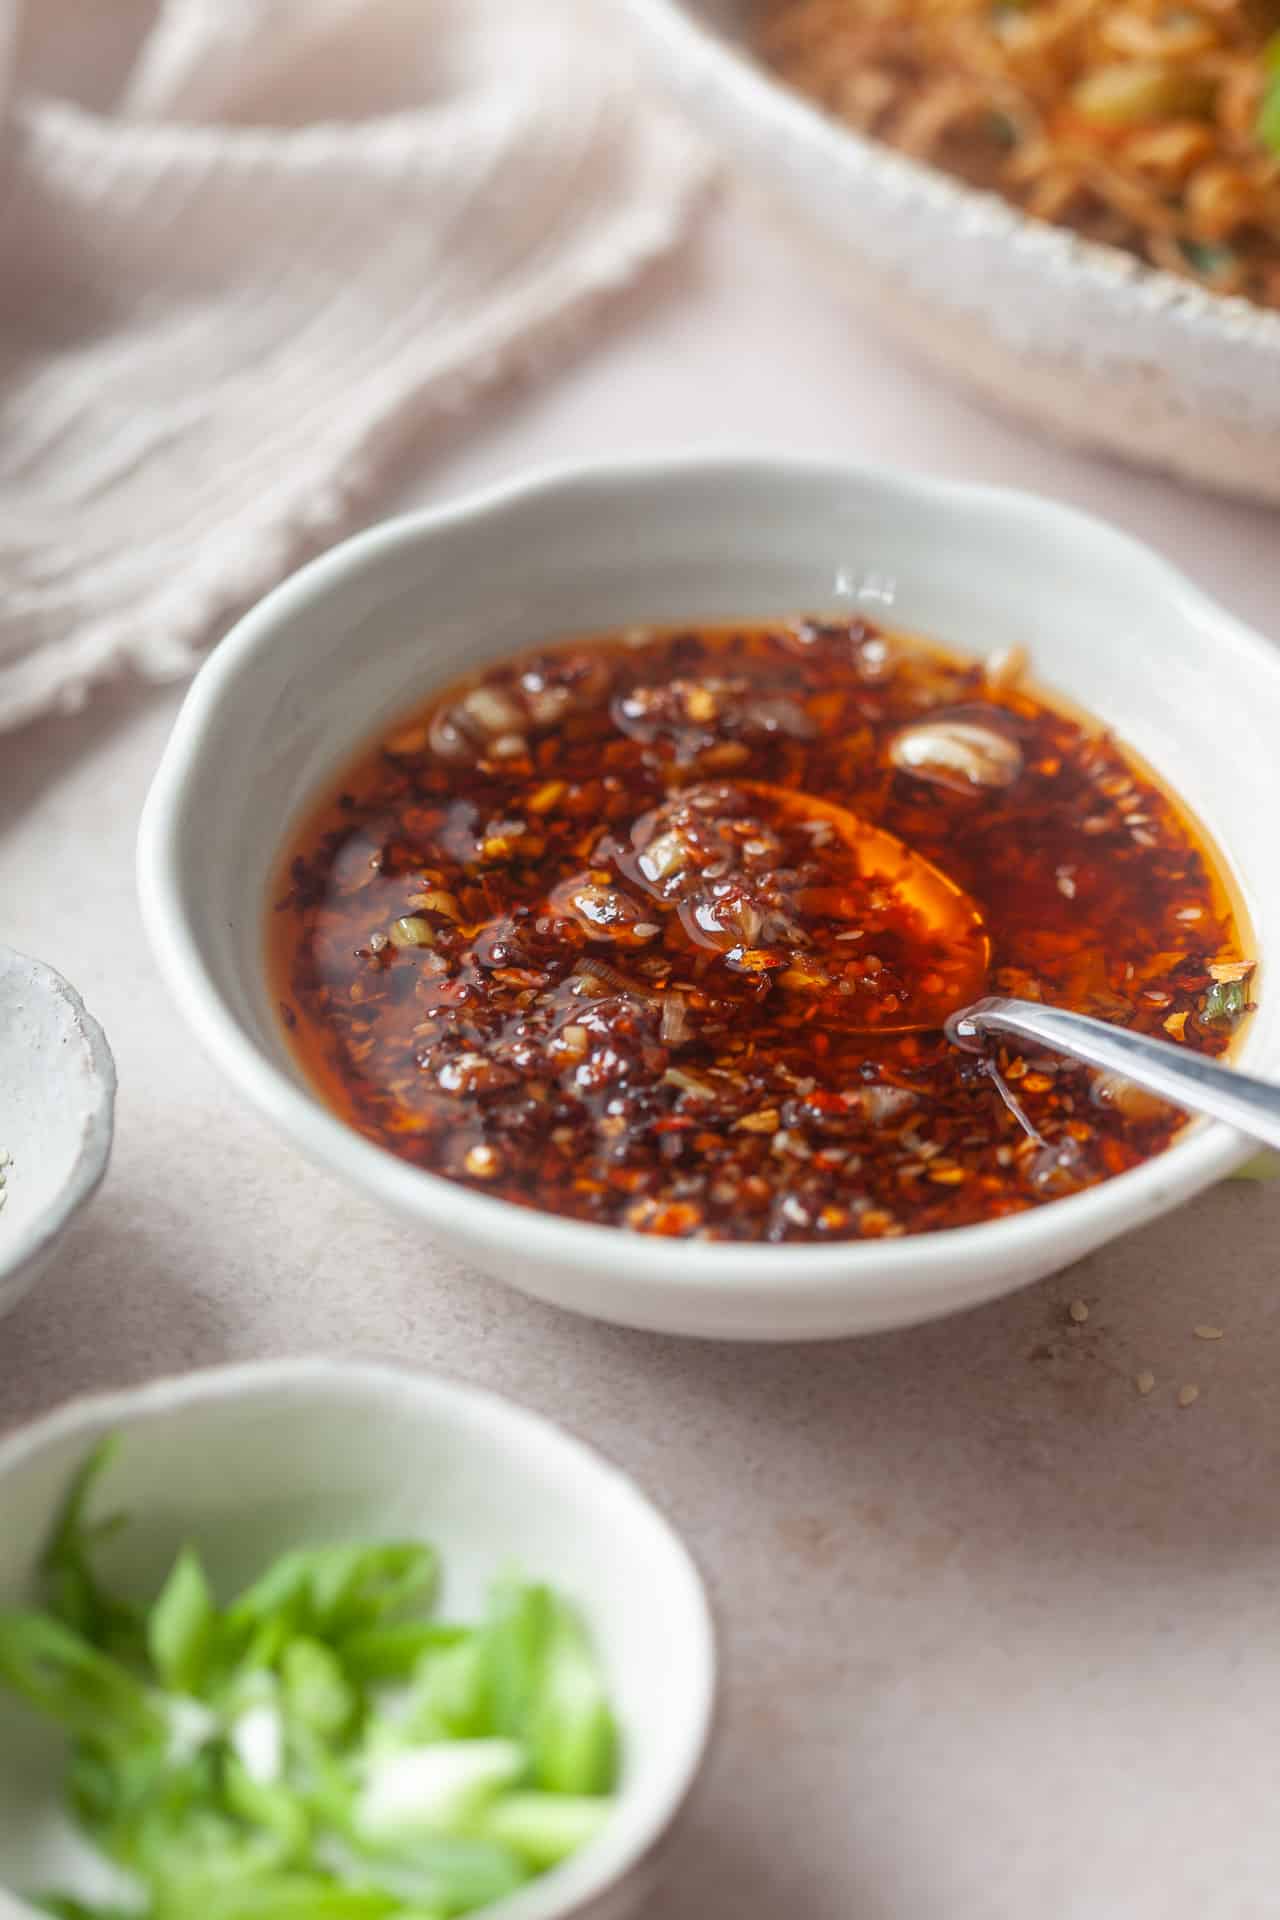
Cool and store
Let the chili oil cool completely before transferring it to a clean jar with a tight lid.
Serving ideas
Garlic chili oil is incredibly versatile! It’s like that secret finishing touch that makes everything better.
Here are some delicious, easy serving ideas to help you put your homemade chili oil to good use:
Noodles & dumplings:
- Drizzle over ramen, soba, or rice noodles for an instant upgrade.
- Add to stir-fried noodles or lo mein for heat and depth.
- Spoon over dumplings, gyoza, or potstickers with a splash of soy sauce.
Rice & grain bowls:
- Mix into plain steamed rice or fried rice for bold flavor.
- Add to grain bowls with quinoa, tofu, roasted veggies, and greens.
- Stir into congee or savory oatmeal for a spicy kick.
Egg dishes
- Drizzle over scrambled eggs, fried eggs, or omelets.
- Use as a finishing touch on a breakfast sandwich or avocado toast.
Salads & veggies:
- Whisk into a vinaigrette for a spicy salad dressing.
- Toss with roasted vegetables like cauliflower, sweet potatoes, or Brussels sprouts.
- Use as a warm dressing over blanched greens like bok choy or spinach.
Snacks & appetizers:
- Serve as a dipping oil with spring rolls, tempura, or crispy tofu.
- Use it to finish soups like miso, hot & sour, or tomato for a spicy edge.
Storage tips
Store in the refrigerator for up to 3 weeks (and often longer).
Always use a clean, dry spoon to avoid introducing moisture or bacteria.
Over time, the garlic may deepen in flavor, so the chili oil gets even better after a day or two.
Here are some more helpful storage tips for your homemade garlic chili oil to keep it fresh, flavorful, and safe:
Let it cool completely before storing:
Allow the chili oil to come to room temperature before sealing and storing. This helps prevent condensation, which can introduce moisture and shorten shelf life.
Store in a clean, airtight jar:
Use a sterilized glass jar or heatproof container with a tight-fitting lid. Clean jars reduce the risk of contamination.
Keep it in the fridge:
While chili oil can be stored at room temperature for short periods, refrigeration is safest, especially since this version contains fresh garlic and spring onion.
In the fridge, it will last for up to 3 weeks (often longer if handled properly).
Use a clean spoon every time:
Always use a clean, dry spoon to scoop out the chili oil. Avoid dipping anything used for tasting or cooking directly into the jar to keep bacteria and moisture out.
Give it a stir if it separates:
Chili oil can naturally separate or thicken in the fridge. Just give it a quick stir or let it sit at room temperature for a few minutes before using.
Freezing:
While freezing chili oil isn’t super common, it can be done if you want to extend its shelf life or make a big batch in advance. Here’s how to do it safely and effectively:
- Freeze in small portions using ice cube trays or silicone molds. Once frozen, pop out the cubes and store them in a freezer-safe bag or an airtight container. This makes it easy to grab just what you need.
- If you’re freezing a larger batch, use clean, airtight glass jars or containers labeled as freezer-safe. Leave a little headspace at the top to allow for expansion.
- Chili oil freezes well for up to 3 months without a noticeable loss in flavor or quality.
- Let frozen chili oil thaw in the fridge overnight or at room temperature for about 30 minutes. Stir it before using, as ingredients may settle or separate slightly.
If your chili oil has fresh ingredients like garlic or spring onion, freezing is especially smart, as it helps reduce the risk of bacterial growth from prolonged fridge storage.
Homemade Garlic Chili Oil
Make your own Homemade Garlic Chili Oil in just 10 minutes! This easy, flavor-packed sauce is the perfect spicy topping, ideal for drizzling over noodles, dumplings, rice bowls, or even roasted veggies.
Ingredients
- 6 cloves garlic,
- 3 tbsp chili flakes, adjust to heat preference
- 2 spring onions, white parts only
- 1 tsp sesame seeds
- 1 tbsp soy sauce
- 1 tsp dark rice vinegar (or regular rice vinegar)
- 1/2 cup neutral oil (like canola, grapeseed, or sunflower)
- 1 tsp toasted sesame oil
Instructions
- In a heatproof bowl or jar, combine chili flakes, minced garlic, sliced spring onions, and sesame seeds. Set this aside.
- Pour the neutral oil into a small saucepan and heat over medium-low. After 2–3 minutes, test the temperature by dropping in a slice of spring onion - it should sizzle gently, not burn. You’re aiming for around 180–190°C (350–375°F).
- Carefully pour the hot oil over the chili-garlic mixture. It should bubble and sizzle immediately, releasing a fragrant aroma. Stir gently to evenly toast everything in the heat.
- Once it stops bubbling, stir in the soy sauce, rice vinegar, and a drizzle of toasted sesame oil. Mix well to incorporate.
- Let the chili oil cool completely. Transfer to a clean jar with a tight lid. Store in the refrigerator for up to 3 weeks (it may last longer, but always use a clean spoon and keep an eye on freshness).
Nutrition Information:
Yield: 8 Serving Size: 1Amount Per Serving: Calories: 143Total Fat: 15gSaturated Fat: 1gTrans Fat: 0gUnsaturated Fat: 13gCholesterol: 0mgSodium: 111mgCarbohydrates: 2gFiber: 1gSugar: 0gProtein: 1g
Nutrition data is automatically calculated using Nutritionix and may not be accurate.