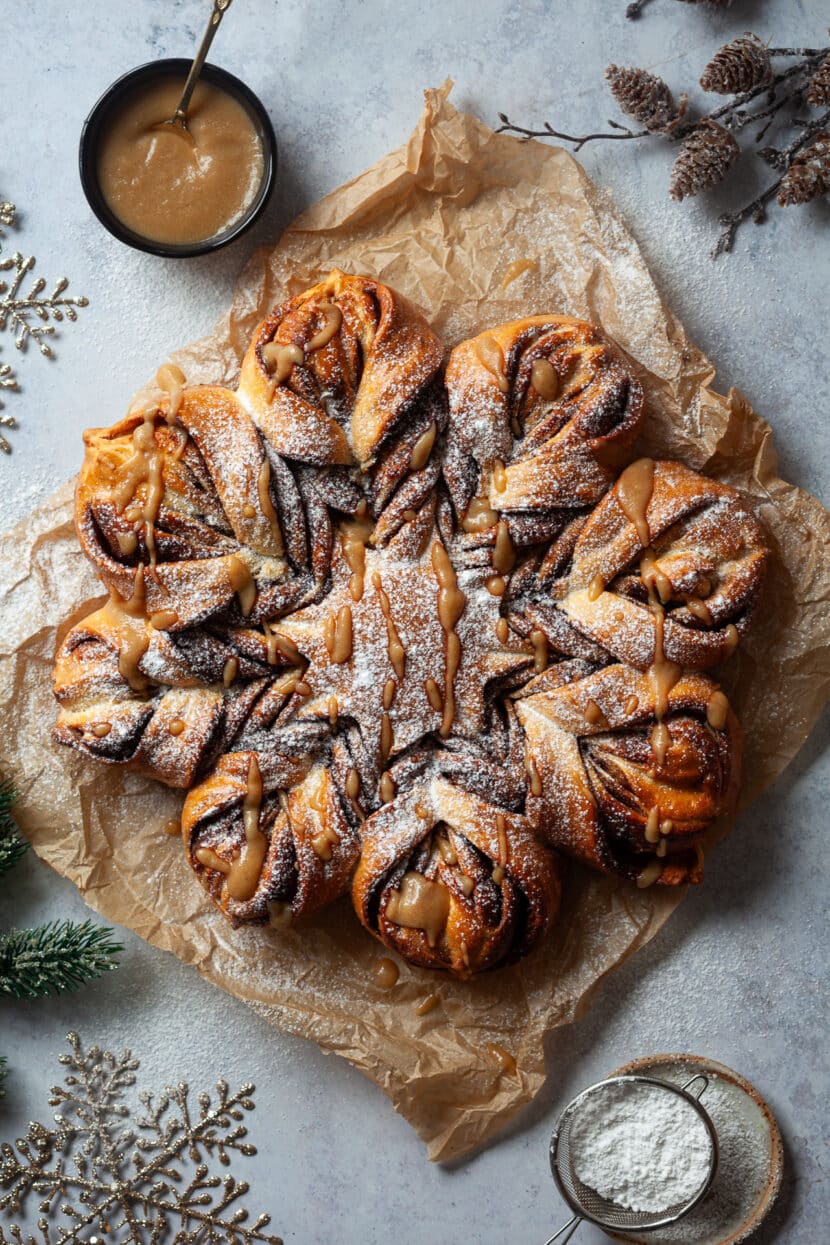
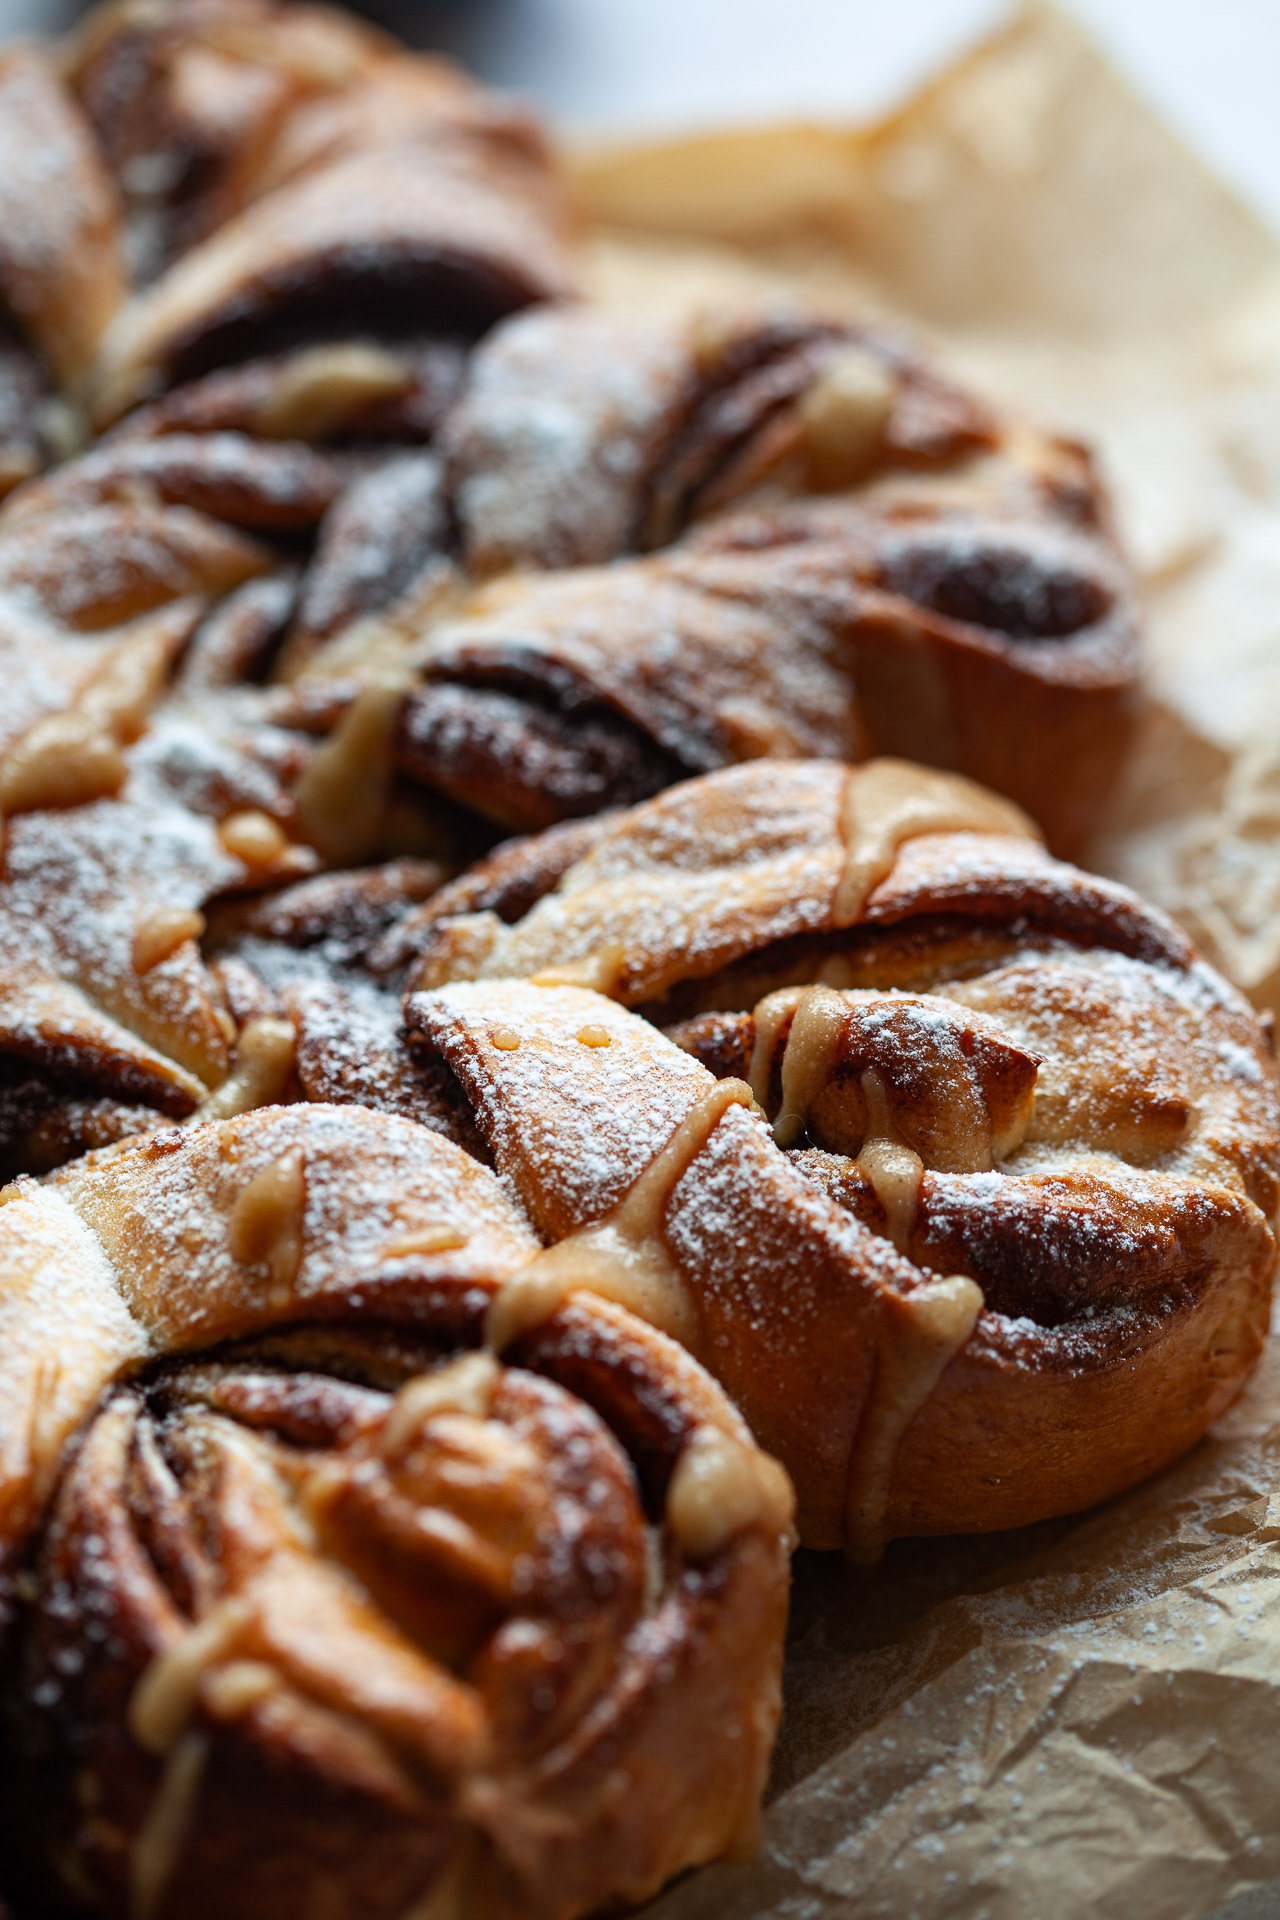
A Dairy-Free Chocolate Snowflake Bread recipe that will be the centerpiece of your holiday table. Just pull it apart and enjoy!
Put winter wonderland flavors on your holiday table with this stunning Dairy-Free Chocolate Snowflake Bread – a soft and fluffy snowflake with a vegan chocolate spread is a delicious treat that you can simply just pull apart and enjoy. This winter-inspired treat is here to steal the show and captivate your guests, family, and friends.
The preparation is simple, and we only spend a little extra time assembling, but the final result is more than worth the creative process. And although it looks elaborate and maybe kind of difficult to make… it is actually not! Just trust the process and follow the instructions, and you too will have this tasty masterpiece on your table. And even if it doesn’t turn out perfectly shaped … don’t worry. Even snowflakes are not two alike, but all are beautiful.
Chocolate Snowflake Bread Ingredients
To make this dairy-free chocolate Snowflake Bread recipe you will need the following ingredients:
Plant Milk: is your liquid base for the dough, it helps activate the yeast and contributes moisture to create a soft texture. We recommend using soy or almond milk in this recipe. Make sure to warm it up to a lukewarm / body temperature before using it. Avoid using cold plant milk, as it will keep the dough from rising properly.
Yeast: acts as a leavening agent, causing the dough to rise. You can use fresh yeast or active dry yeast.
Maple Syrup: sweetens the dough and balances the flavors
Eggs: add moisture, help in leavening, and provide structure to the final product. Eggs make the dough rich and help it rise. Is using eggs in cooking, we always choose to use cruelty-free free-range eggs from a nearby small farm.
Vegan Butter: adds richness to the dough, and enhances the taste and texture, making the bread tender. We like to use the brand Violife or Naturli.
Flour: provides the necessary structure and texture to the dough.
Salt: strengthens the dough and improves the taste of the dough
Vegan Chocolate Spread: adds a chocolatey layer to the bread for more flavor and a delightful filling. We usually just buy a vegan store-bought spread (we especially like Valsoia), but we also have a recipe for a homemade vegan “nutella” spread.
To finish the snowflake bread we used a beaten egg, which provides a glossy finish and helps with browning.
How to make it vegan
We would like to stress again, that this recipe is dairy-free, but not vegan, as we do use eggs in the dough.
If you would like to make the dough vegan, you can skip the eggs, but add more plant milk and melted vegan butter to the dough (about the same amount as two eggs would weigh).
For the glossy finish, we would brush the dough with plant milk and a small drizzle of maple syrup stirred in it.
How to make this Chocolate Snowflake Bread
Making this Chocolate snowflake bread is straightforward. I would like to stress to make sure all your ingredients are at room temperature before starting, as this will ensure the dough rises properly. Keep the room warm and draft-free, too.
Start by activating the yeast:
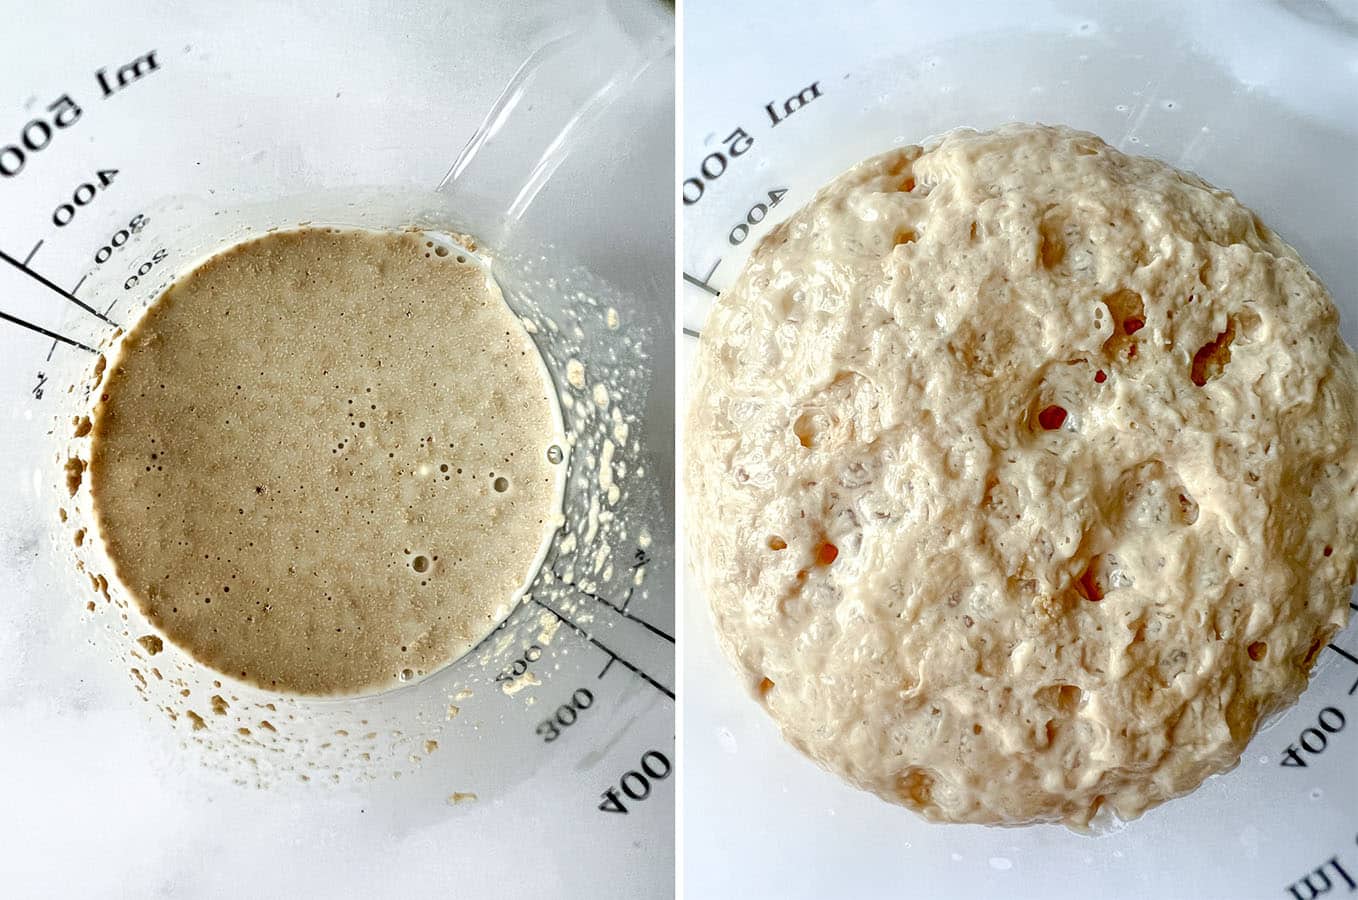
In a small bowl, kickstart the yeast activation by dissolving fresh yeast (or active dry yeast) in half of the warm plant milk. Add a teaspoon of sugar and a teaspoon of flour to fuel the yeast. Give it a good stir, cover it with a cloth, and let it rest for 5 minutes. Keep an eye out for that moment when the yeast turns frothy and doubles in size.
Prepare the Dough:
In a larger mixing bowl, combine the remaining plant milk, maple syrup, eggs, melted vegan butter, and the activated yeast mixture. Stir it before adding the flour and salt. Knead the ingredients into a soft and elastic dough for about 10 minutes, either by hand or using a stand mixer. The dough should have a slight stickiness to it.
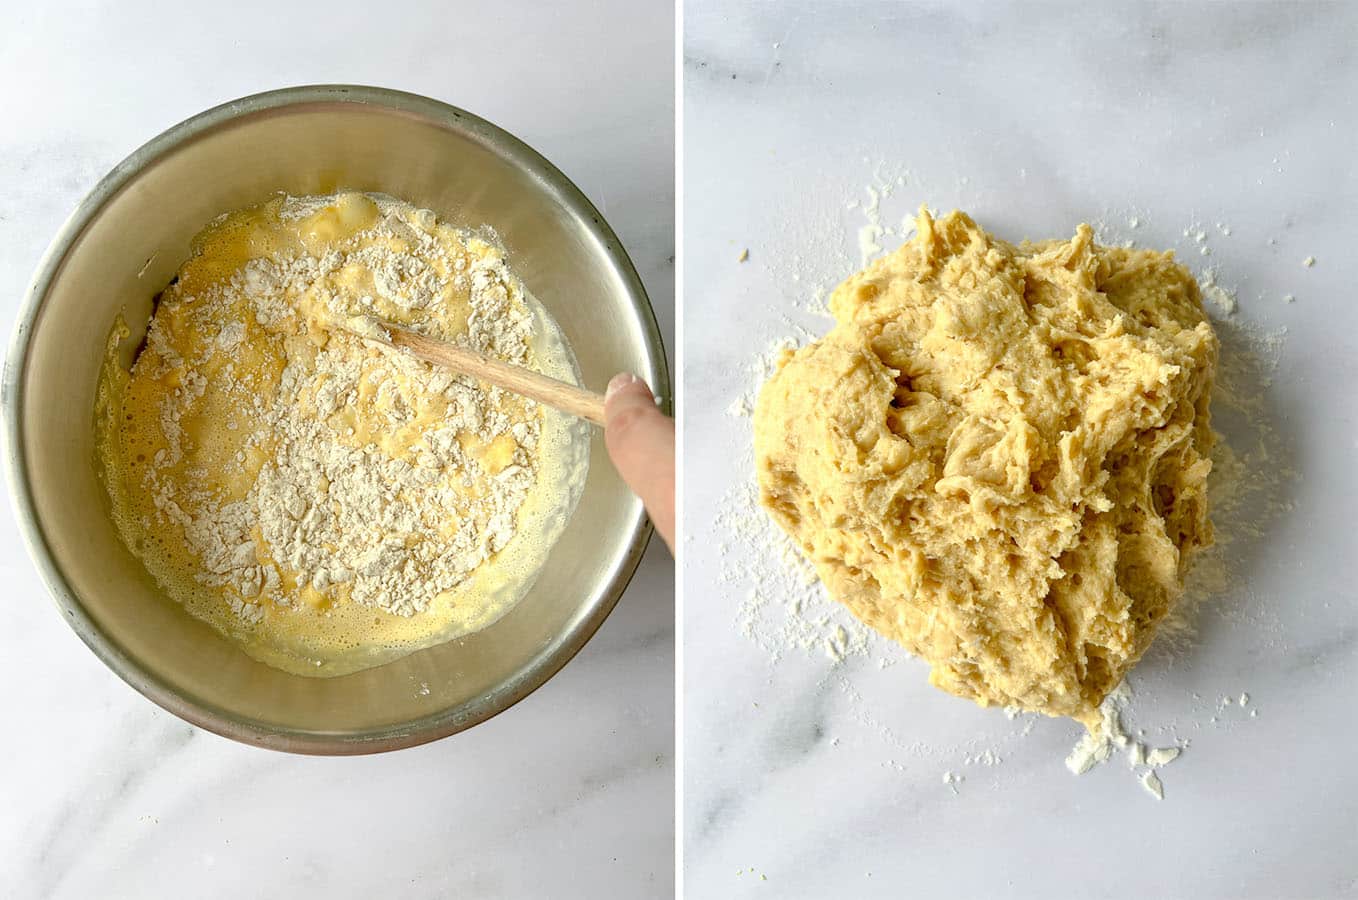
First Rising:
Transfer the well-kneaded dough to a lightly oiled bowl. Cover it with plastic wrap or a plastic bag, and let it rise in a warm, draft-free place. An oven with the light on is an ideal spot. Allow the dough to rise for 50-60 minutes, or until it doubles in size.
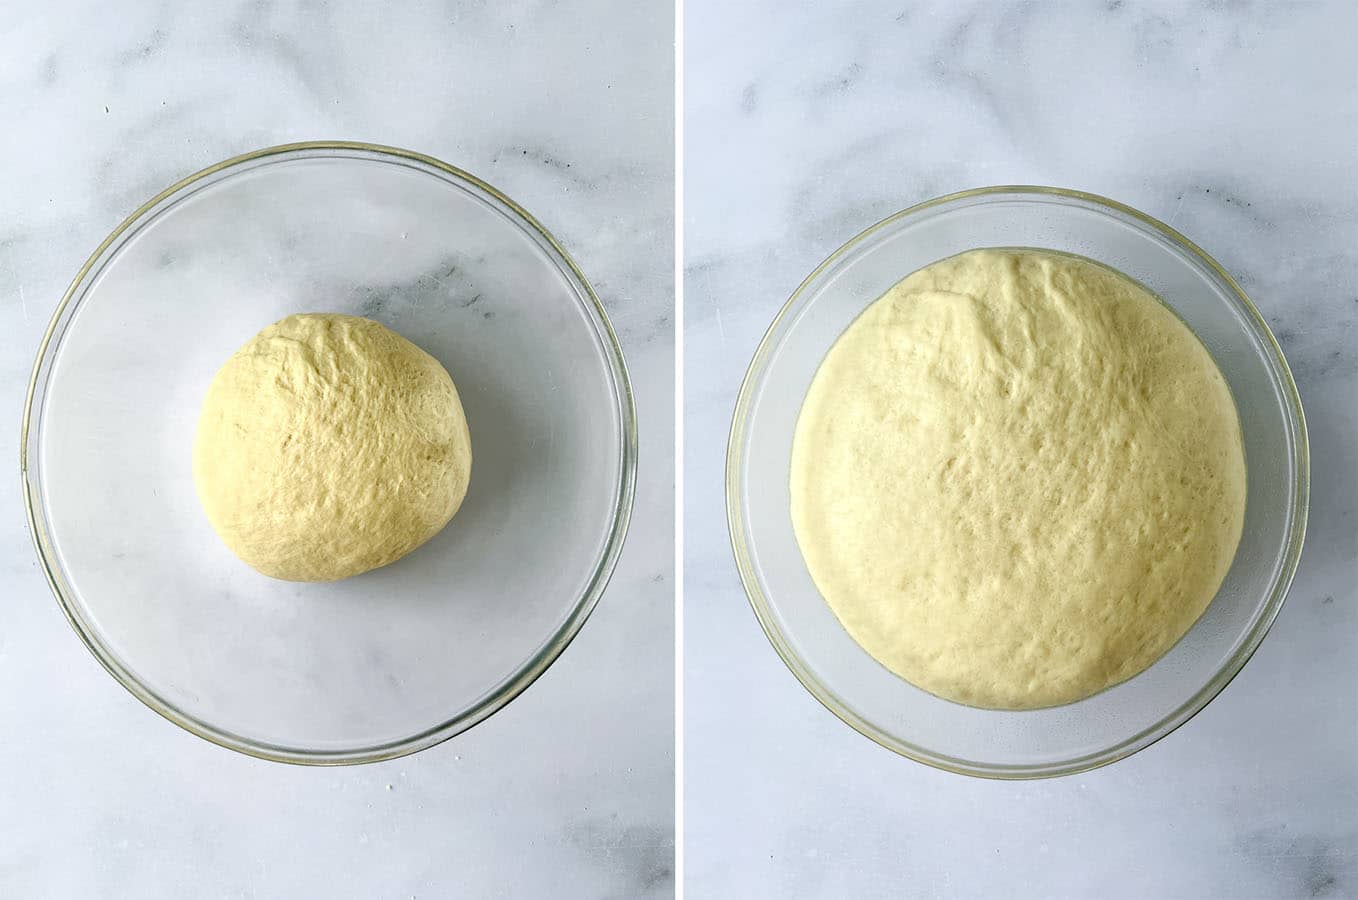
Line a large baking pan with parchment paper.
Shaping the dough
Turn the risen dough onto a floured surface. Shape it into a ball and divide it into four equal parts. Roll each portion into a thin circle, matching the size of the baking pan.
Spread one-third of the vegan chocolate spread on the first circle, leaving a 2 cm (1 inch) border. Layer the second circle on top, and repeat this process until you’ve used all the dough and spread. For a polished shape, trim the edges with a large bowl as a guide.
Place a smaller glass in the center to retain the shape of the middle. Make precise cuts—four from the glass outwards to create 4 segments. Further split each segment in half to obtain 8 segments, and repeat the process to get 16 equal segments.
Create the snowflake shape: Remove the glass, take two adjacent segments, and twist them twice outward in a spiral. Pinch the ends together. Repeat this process with the remaining dough segments, forming a beautiful snowflake pattern.
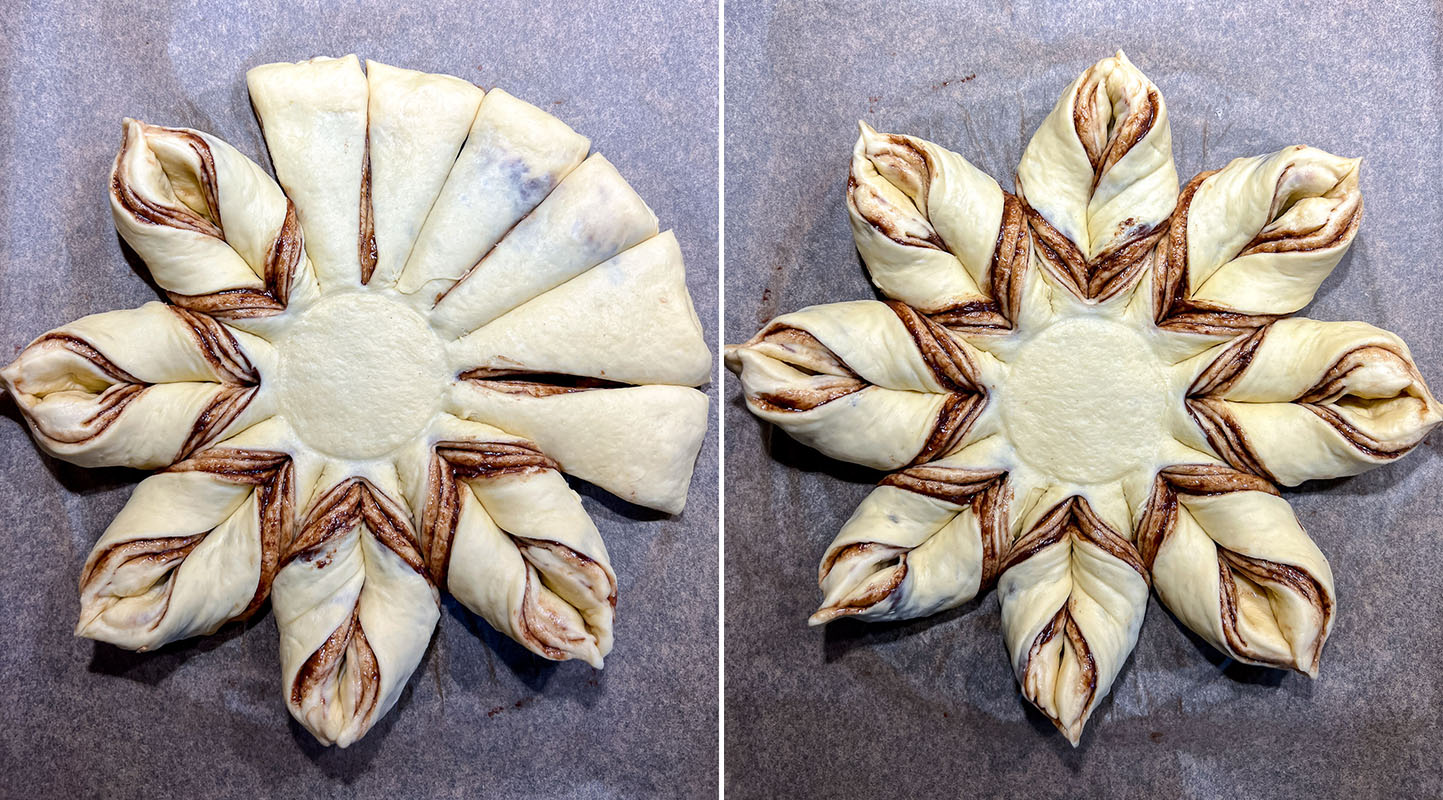
Second Rising
Cover the shaped dough with a cloth and let it rise for an additional 45 minutes.
Baking
Meanwhile, preheat your oven to 160°C / 320°F.
Brush the risen dough with the beaten egg for a glossy finish.
Place the dough in the preheated oven and bake for 20-25 minutes or until the bread achieves a golden brown hue.
Once baked, let the bread cool on the pan for 10 minutes. Then, transfer it to a wire rack to cool completely.
Serving Suggestions
Before serving, consider dusting the snowflake with powdered sugar and drizzling it with a vegan caramel or chocolate topping for an extra layer of sweetness. Some tasty butterscotch sauce would also work splendidly!
You can drizzle the sauce on top, or serve it in a small bowl on the side, so guests can simply dip their bread as they like – try adding a variety of sauces for the best experience!
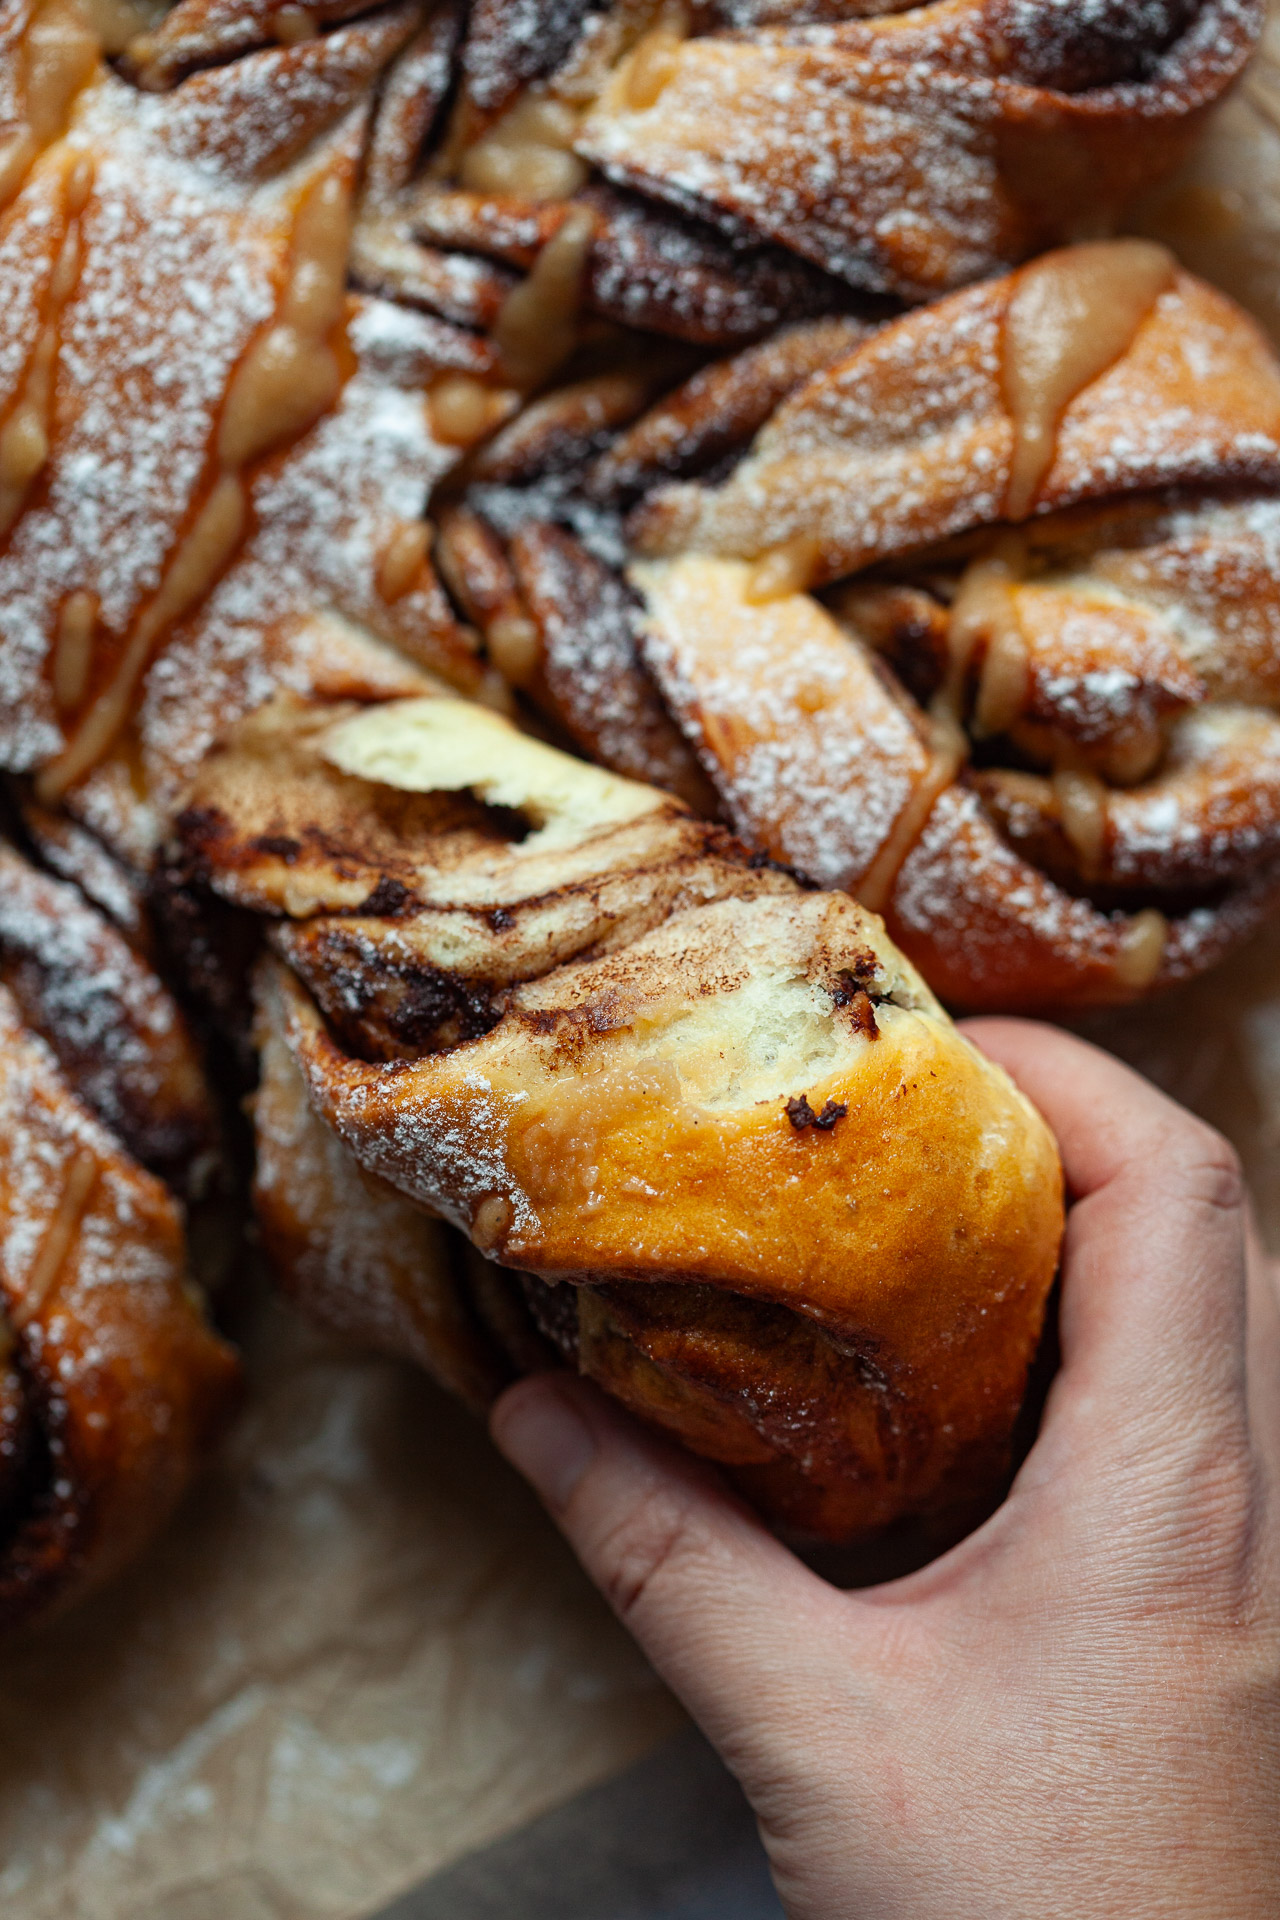
This snowflake bread is a pull-apart bread, so you could choose to serve it as is and your guests can simply tear a piece of the bread for themselves.
If you want to keep things tidy, use a sharp knife to slice the snowflake along the predetermined segments.
This chocolate snowflake bread is perfect to serve as a dessert after your festive meal, along with a cup of coffee or vegan hot chocolate for kids.
Whether shared among friends, enjoyed with family, or presented as a stunning centerpiece at a holiday gathering, this chocolate snowflake bread is sure to be a crowd-pleaser!
Storage Tips
If you happen to have any leftovers (ahem, I am sure), make sure to cool the chocolate bread down first, before storing it, as warm bread will encourage condensation and molding.
Once cooled, store the chocolate snowflake bread in an airtight container or cover it with plastic wrap to prevent it from drying out. You can keep it at room temperature for up to 2 days.
For an extended shelf life, transfer the bread to the refrigerator where it can wait for up to 5 days. Before serving, allow it to come to room temperature or warm it slightly in the oven.
If you want to store the chocolate snowflake bread for an even longer period, consider freezing it. Wrap the bread tightly in plastic wrap, followed by aluminum foil, to protect it from freezer burn. Label the package with the date to easily track its freshness. Freeze for up to 2-3 months.
When ready to enjoy the frozen bread, transfer it to the refrigerator overnight. Alternatively, thaw individual slices in a microwave or at room temperature.
To refresh the texture and taste of the bread, warm it in a preheated oven at a low temperature for a few minutes. Avoid using a microwave for reheating, as it can result in uneven warming.
By following these storage tips, you can savor the chocolate snowflake bread over an extended period, ensuring that each bite remains as delightful as the first.
More similar recipes:
Vegan Chocolate Hazelnut Spread
Vegan Hot Cross Chocolate Buns
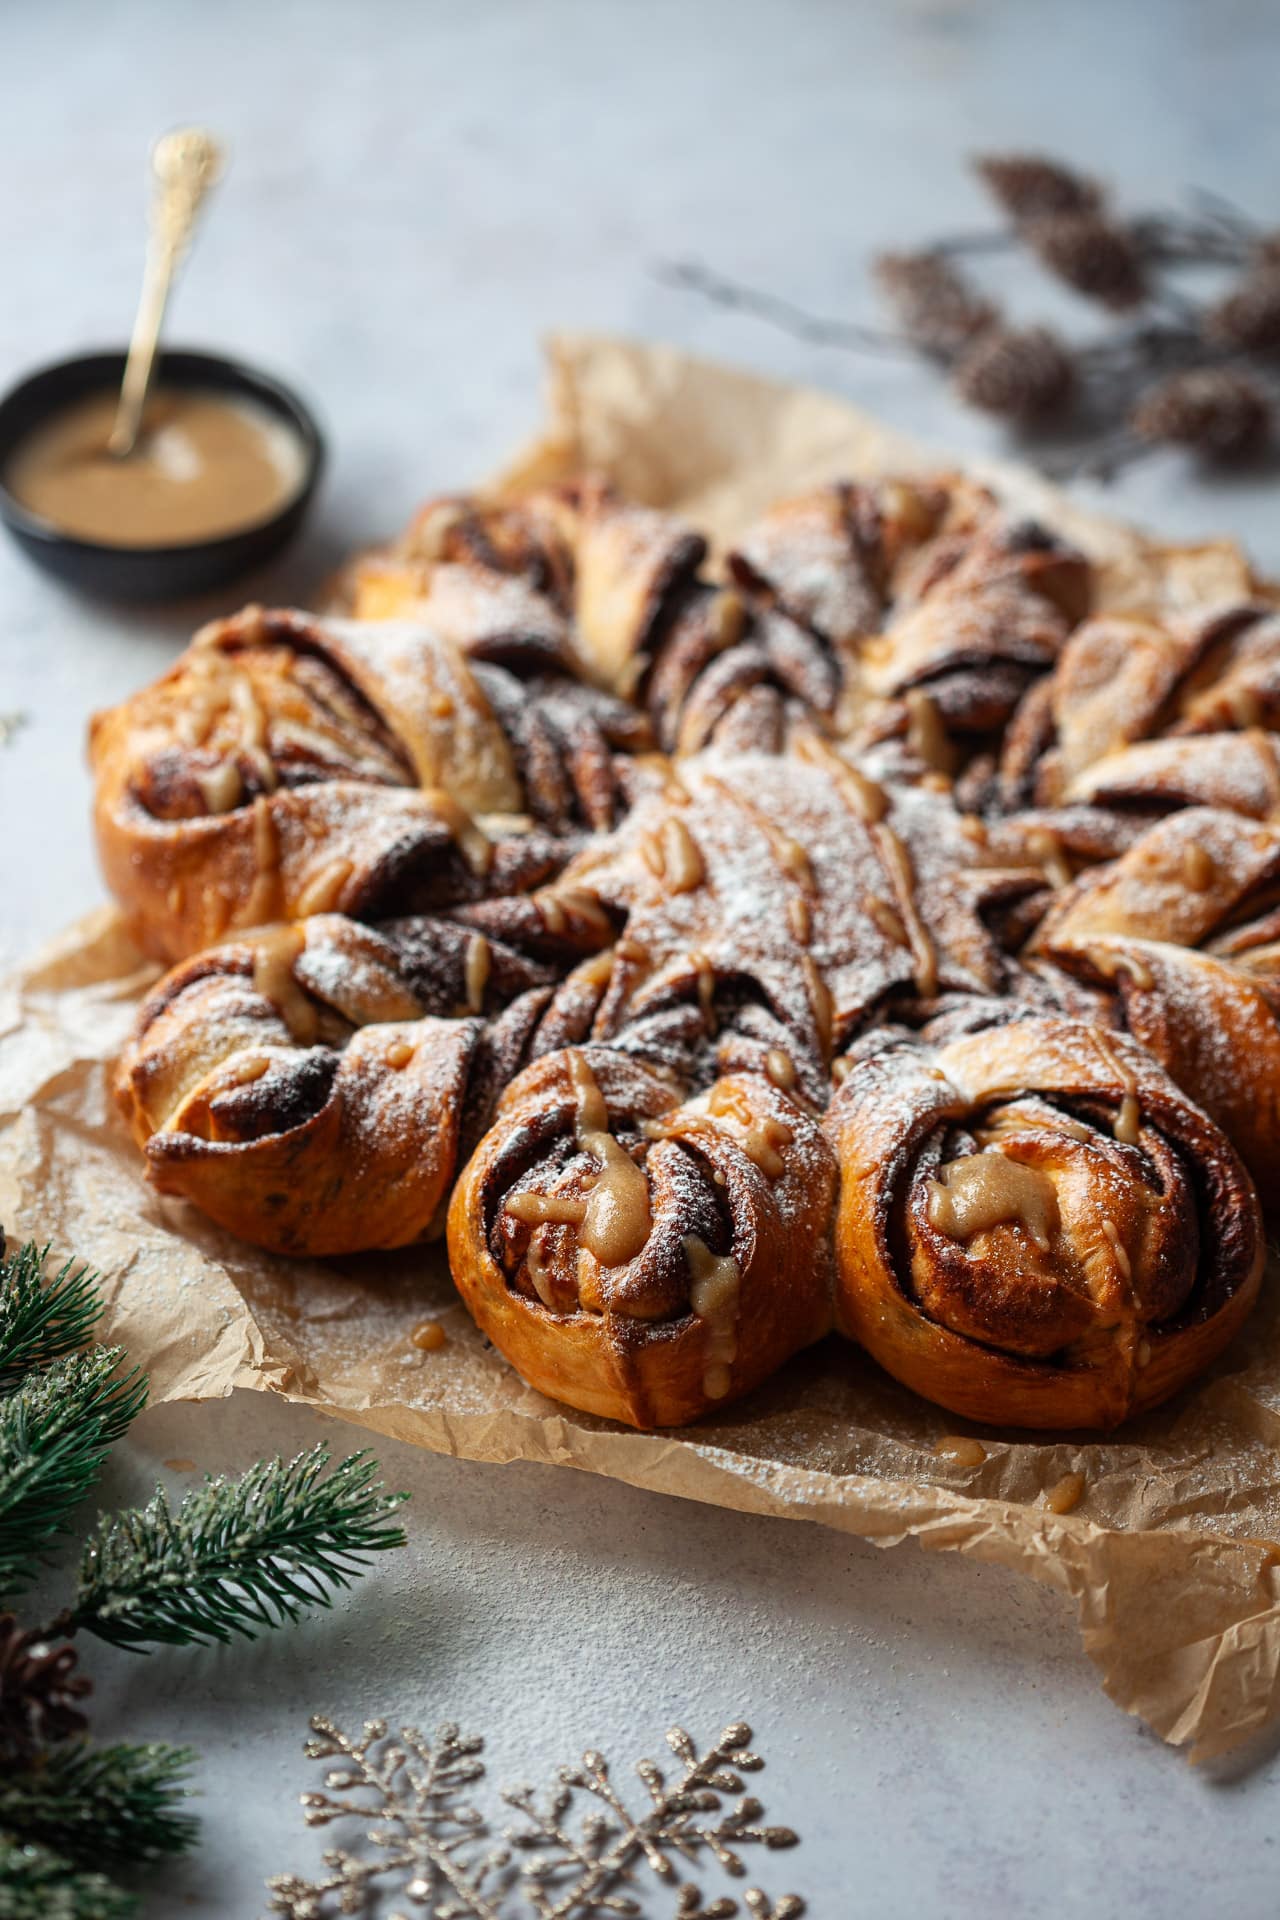
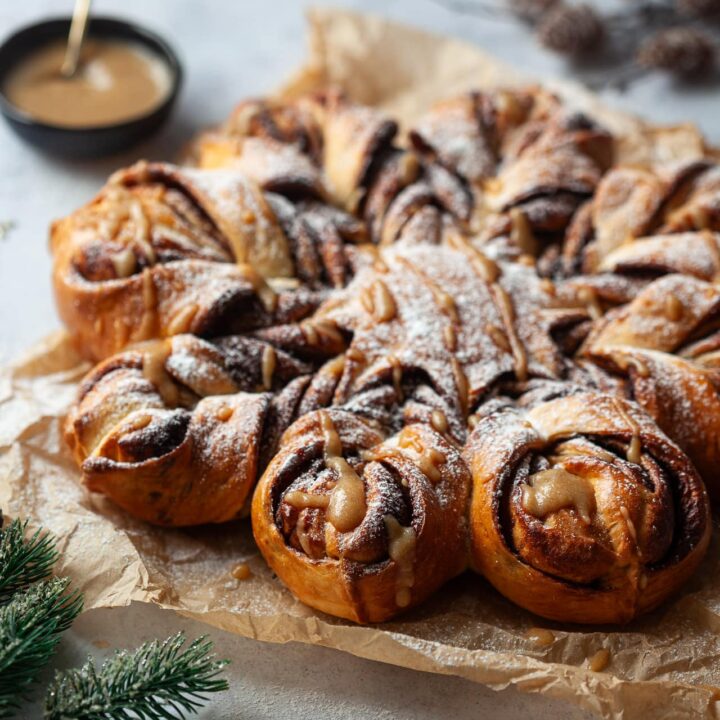
Dairy-Free Chocolate Snowflake Bread
A Dairy-Free Chocolate Snowflake Bread recipe that will be the centerpiece of your holiday table. Just pull it apart and enjoy!
Ingredients
Dough:
- 250 milliliters (1 cup) warm plant milk (we recommend soy or almond milk)
- 1 cube of fresh yeast (42 grams) or 1 packet (7 grams) of active dry yeast
- 1 tablespoon of maple syrup
- 2 eggs, at room temperature
- 56 grams of melted vegan butter
- 500 grams of flour
- Half a teaspoon of salt
Other:
- 150 grams of vegan chocolate spread (storebought or see notes for a homemade recipe)
- 1 beaten egg
Instructions
- First, activate the yeast: dissolve the fresh yeast in half of the warm plant milk, and add a teaspoon of sugar and a teaspoon of flour. Stir well, cover with a cloth, and let it sit for 5 minutes until the yeast becomes frothy and doubles in size.
- Prepare the dough: in a bowl, mix the remaining plant milk, maple syrup, eggs, melted vegan butter, and the activated yeast. Stir, then add the flour and salt. Knead into a soft and elastic dough for about 10 minutes (you can use a stand mixer). The dough should be slightly sticky.
- First rising: Transfer the kneaded dough to a lightly oiled bowl, cover it with plastic wrap or a plastic bag, and let it rise in a warm place (such as in the oven with the light on) for 50-60 minutes, or until the dough doubles in size.
- Line a large baking pan with parchment paper.
- Shape the bread: turn the risen dough out onto a floured surface, shape it into a ball, and divide it into 4 equal parts. Roll out each portion into a thin circle about the size of the baking pan. Place the first circle on the baking pan, spread one-third of the vegan chocolate spread on it, leaving a 2 cm (1 inch) border, and then place the second circle of dough on top. Repeat with another layer of spread, a layer of dough, a third layer of spread, and finish with the fourth layer of dough.
- For a neater shape, you can trim the edge to make a perfect circle (you can use a large bowl as a guide and trim the excess dough). Then, place a smaller glass in the center to maintain the shape of the middle. Don't press it in too hard, it's just a guide. Make four cuts from the glass outwards to create 4 segments. Then, split each segment in half to get 8 segments. Split each segment in half again to get 16 equal segments.
- Remove the glass, and then take two adjacent segments, twist them twice outward in a spiral, and pinch the ends together. Repeat this with the remaining dough to create the snowflake shape.
- Second rising: Cover the dough with a cloth and let it rise for an additional 45 minutes.
- Preheat the oven to 160°C (320°F).
- Brush the risen dough with the beaten egg, then place it in the preheated oven and bake for 20-25 minutes, or until it's golden brown.
- Remove the baked bread from the oven, let it cool on the pan for 10 minutes, then transfer it to a wire rack to cool completely.
- Before serving, you can dust the snowflake with powdered sugar and drizzle it with a vegan caramel or chocolate topping of your choice.
Notes
- this recipe is dairy-free, but not vegan, as we do use eggs in the dough and for brushing before baking
- If you want to make the dough vegan, you can skip the eggs, but add more plant milk and melted vegan butter to the dough (about the same amount as two eggs would weigh). For the glossy finish, we would brush the dough with plant milk and a small drizzle of maple syrup stirred in it.
- Ensure that the ingredients are at room temperature for better dough rising.
- Be cautious to allow the dough to rise in a warm, draft-free place (similar to making donuts).
- You can make your own vegan "Nutella" at home, use this recipe
Nutrition Information:
Yield: 12 Serving Size: 1Amount Per Serving: Calories: 287Total Fat: 10gSaturated Fat: 5gTrans Fat: 1gUnsaturated Fat: 4gCholesterol: 48mgSodium: 122mgCarbohydrates: 42gFiber: 2gSugar: 9gProtein: 7g
Nutrition data is automatically calculated using Nutritionix and may not be accurate.

