


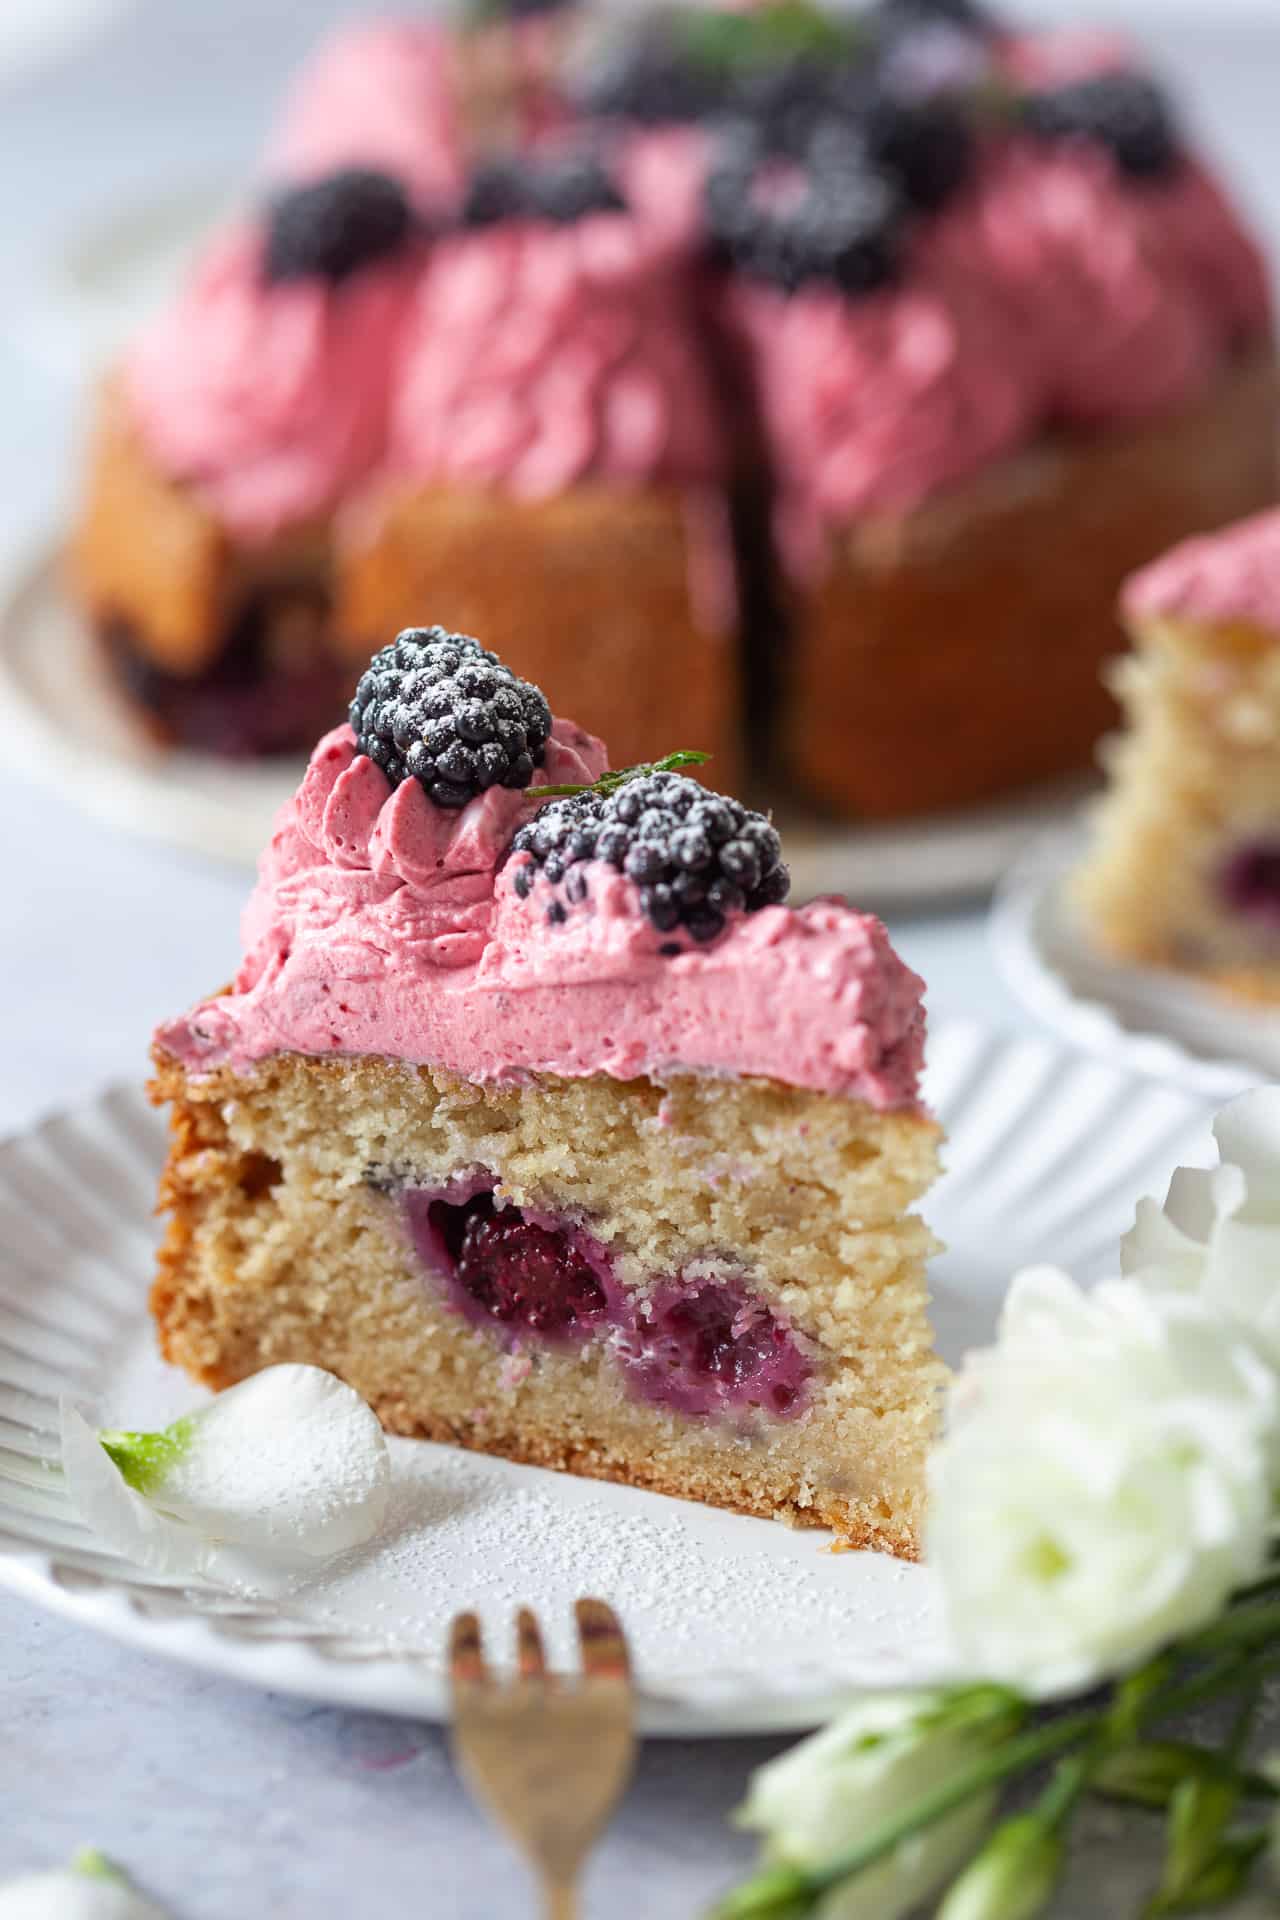
This Easy Blackberry Yogurt Cake is packed with fresh blackberries and topped with blackberry jam cream. Simple, seasonal, and delicious!
This Easy Blackberry Yogurt Cake is our favorite excuse to bring home a little extra fruit from our summer bike rides.
Blackberry season has officially arrived, which means our bike rides have a new and very delicious purpose. Whenever we spot those little clusters of dark berries growing wild along the gravel roads, we’re very easily convinced that a quick stop is necessary.
What starts as “let’s just pick a few” usually turns into stained fingers, a basket full of berries, and a little detour from our original route. Some berries make it home, and a few mysteriously disappear along the way. Freshly picked blackberries are too good to resist!
Besides being delicious, blackberries are also a wonderful addition to a balanced diet. They’re naturally high in fiber and vitamin C, and provide vitamin K, manganese, and plenty of antioxidant-rich plant compounds called anthocyanins, which give them their beautiful deep purple color.
And when we bring home more berries than we can eat straight from the basket, this Blackberry Cake is one of our favorite ways to use them.
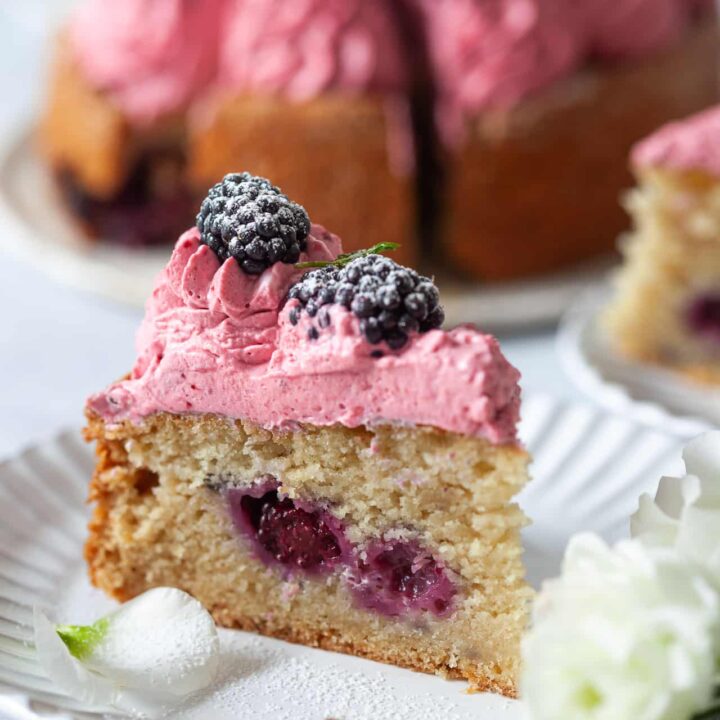
The cake is soft, tender, and wonderfully moist, with juicy fresh blackberries baked right into the sponge. On top, we add a fluffy cream made with (vegan) cream cheese, (vegan) whipped cream, and our own quick homemade blackberry jam.
The result is a beautiful summer cake that’s fruity, creamy, and just sweet enough without feeling overly heavy. It’s perfect for serving with a cup of coffee after a bike ride, bringing along to a summer gathering, or enjoying slowly while blackberry season is still around.
So grab your basket, keep an eye out for those wild blackberry bushes, and save a few of your berries for this cake. 💜
Easy Blackberry Yogurt Cake Ingredients
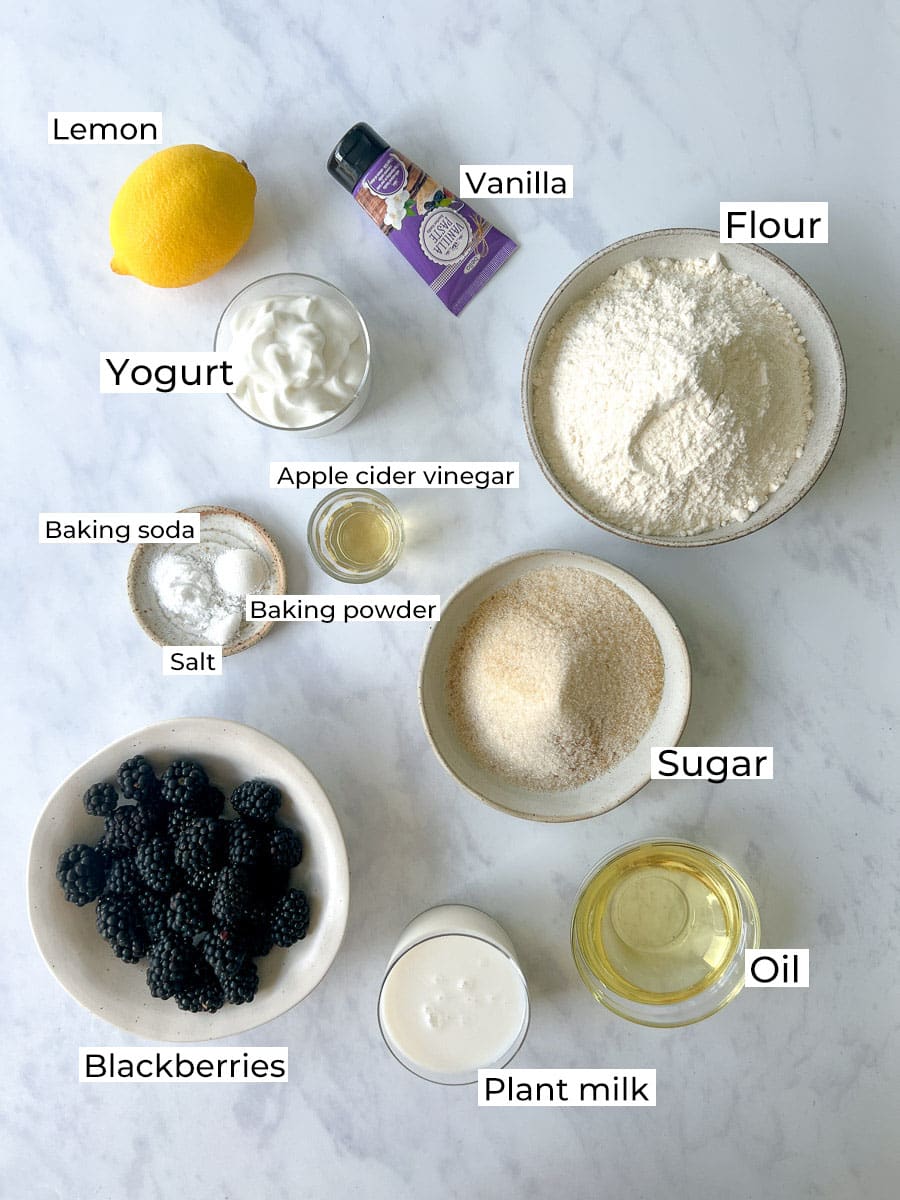
This blackberry yogurt cake comes together with simple, everyday ingredients and plenty of fresh blackberries. The tender yogurt sponge gets its soft, moist texture from vegan yogurt, milk, and oil, while a quick homemade blackberry jam brings bright berry flavor to the creamy topping.
For the best result, use ripe, juicy blackberries and bring refrigerated ingredients to room temperature before baking.
Here’s the list of ingredients!
For the sponge cake, you will need:
- All-purpose flour: The main structure of the cake. For the lightest texture, measure the flour carefully and avoid packing it into the measuring cup. Use a scale with grams for best results!
- Granulated sugar: Adds sweetness and helps create a soft, tender crumb.
- Brown sugar: Adds a little extra moisture and a subtle caramel-like flavor that pairs beautifully with the blackberries. You can also use just one type of sugar.
- Baking powder: Works with the other leavening ingredients to help the cake rise evenly.
- Baking soda: Provides additional lift and helps create a light, fluffy sponge. It also reacts with the yogurt and apple cider vinegar.
- Salt
- Yogurt: Adds moisture and tenderness to the cake. Use plain, unsweetened yogurt for the best results. Plant-based yogurt works well too.
- Plant Milk: Helps create a smooth, pourable batter and keeps the finished cake wonderfully moist.
- Neutral oil: Keeps the sponge soft and moist for days. Use a mild-tasting oil such as sunflower, canola, or vegetable oil.
- Vanilla extract
- Apple cider vinegar: Adds acidity to the batter and reacts with the baking soda, helping the cake rise while keeping the crumb tender.
- Fresh blackberries: Folded into the batter for juicy bursts of fresh blackberry flavor. Choose firm, ripe berries and gently pat them dry after washing.
For the homemade blackberry jam:
- Blackberries: The base of the quick homemade jam. Fresh or frozen blackberries can work, although fresh berries are especially delicious when they’re in season.
- Granulated sugar: Sweetens the berries and helps the mixture thicken as it cooks.
- Lemon juice: Brightens the blackberry flavor and balances the sweetness of the jam.
For the blackberry cream:
- Cream cheese, plant-based: Gives the frosting a rich, creamy texture and a subtle tang that works beautifully with the sweet blackberry jam. For a dairy-free cake, use a firm plant-based cream cheese such as Violife.
- Whipping cream, plant-based: Creates a light and fluffy cream topping. Make sure your plant-based whipping cream is suitable for whipping if using a dairy-free option.
- Powdered sugar: Adds a touch of sweetness to the cream without overpowering the blackberry flavor.
- Homemade blackberry jam: Swirled into the cream to give it a beautiful blackberry color and an intense berry flavor. Add it gradually and adjust to taste.
Use a handful of beautiful ripe berries to finish the cake. You can also add a few small mint leaves or a light dusting of powdered sugar for an extra pretty presentation.
How to make Easy Blackberry Yogurt Cake
This blackberry yogurt cake is surprisingly simple to make, but a few small details make a big difference. The key is to avoid overmixing the batter, let the cake cool completely before decorating, and make sure the homemade blackberry jam is completely cool before adding it to the cream.
Take your time with each step, and you’ll end up with a soft, tender cake layered with bright blackberry flavor and a beautifully creamy topping.
Prepare the oven and cake pan
Preheat the oven to 180°C (356°F), preferably using conventional top and bottom heat. Lightly grease a 20–22 cm (8–9 inch) round cake pan with oil or butter, then dust it lightly with sugar. You can also line the bottom with parchment paper to make removing the cake easier.
If you’re using a springform pan, make sure it closes securely to prevent the relatively thin batter from leaking.
Bring the yogurt and milk to room temperature before starting. Room-temperature ingredients combine more easily and help create an evenly textured batter.
Combine the dry ingredients
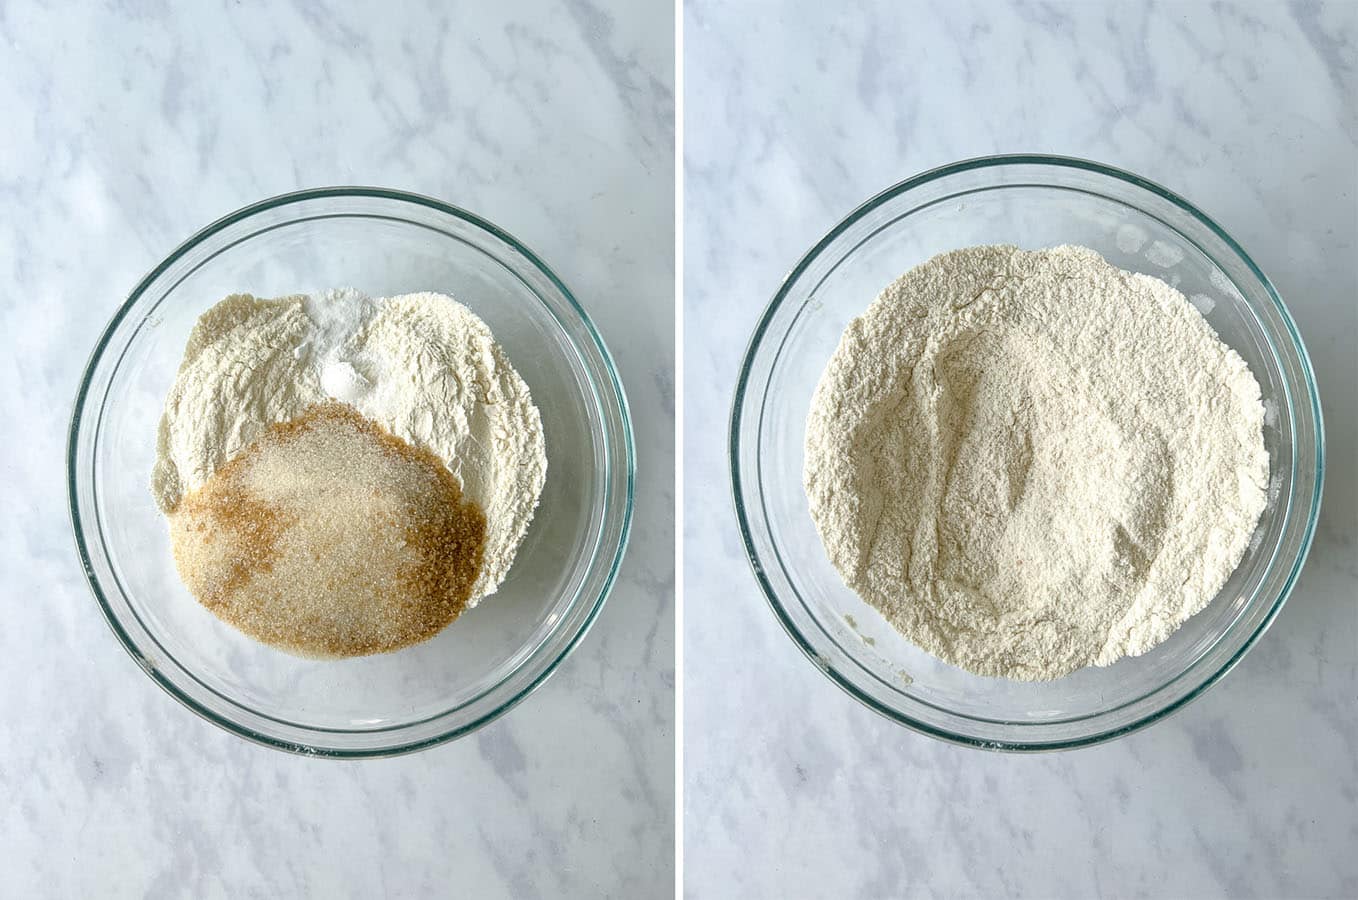
In a large mixing bowl, whisk together the flour, granulated sugar, brown sugar, baking powder, baking soda, and salt until evenly combined.
Breaking up any lumps at this stage is helpful, as you won’t need to mix the batter as much later.
If your flour is particularly lumpy, sift it together with the baking powder and baking soda for an even lighter sponge.
Mix the wet ingredients
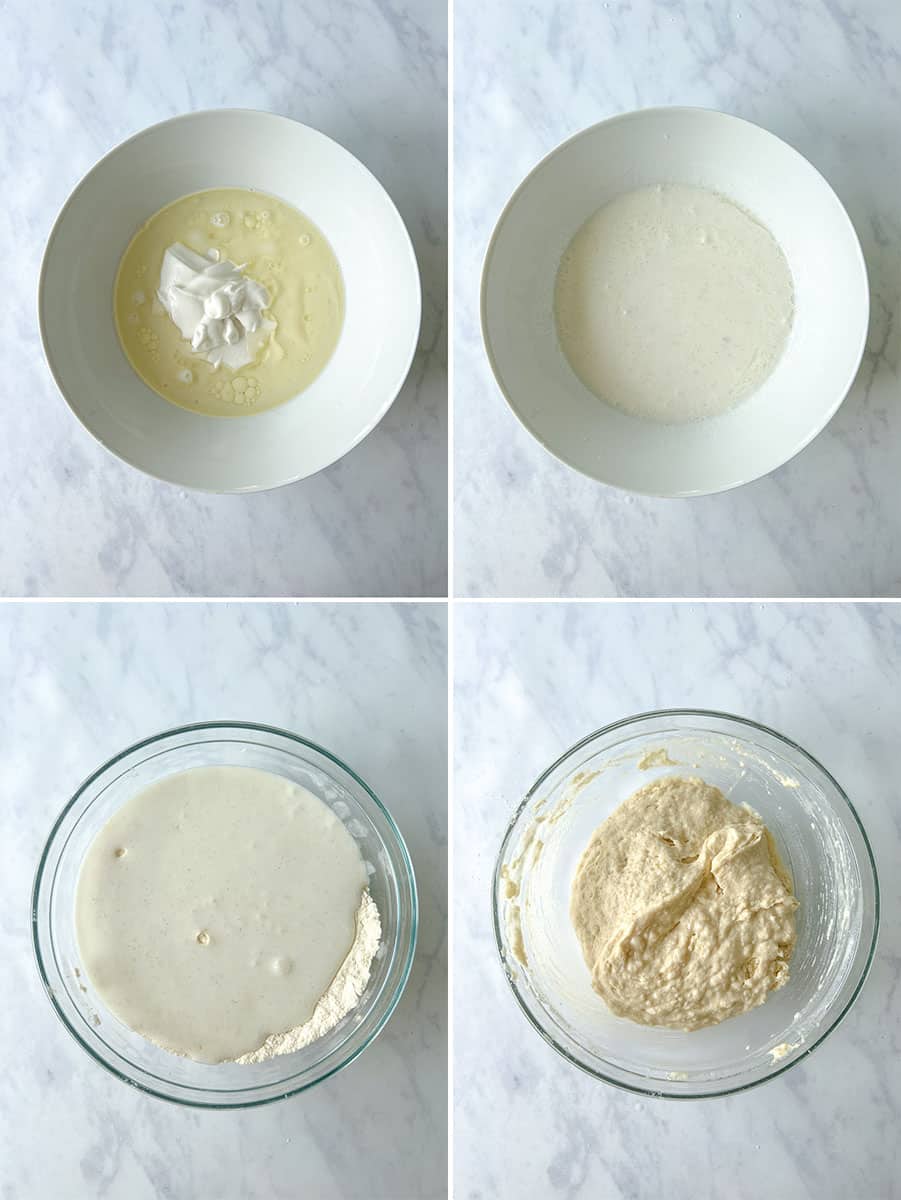
In a separate bowl, whisk together the plant yogurt, milk, neutral oil, and vanilla extract until smooth.
Pour the wet mixture into the bowl with the dry ingredients. Using a spatula or wooden spoon, gently fold everything together until just combined and no large pockets of dry flour remain.
Don’t worry if the batter looks slightly uneven. Overmixing can make the finished cake dense and chewy.
Add the apple cider vinegar and gently fold it through the batter. Finally, add the blackberries and carefully fold them in with a spatula.
If your blackberries are very large, you can cut a few of them in half. Pat freshly washed berries completely dry before adding them to the batter so they don’t introduce excess moisture.
Important: Add the vinegar just before baking. It reacts with the baking soda, creating bubbles that help give the cake a lighter texture.
Bake the cake
Pour the batter into the prepared cake pan and gently smooth the surface with a spatula.
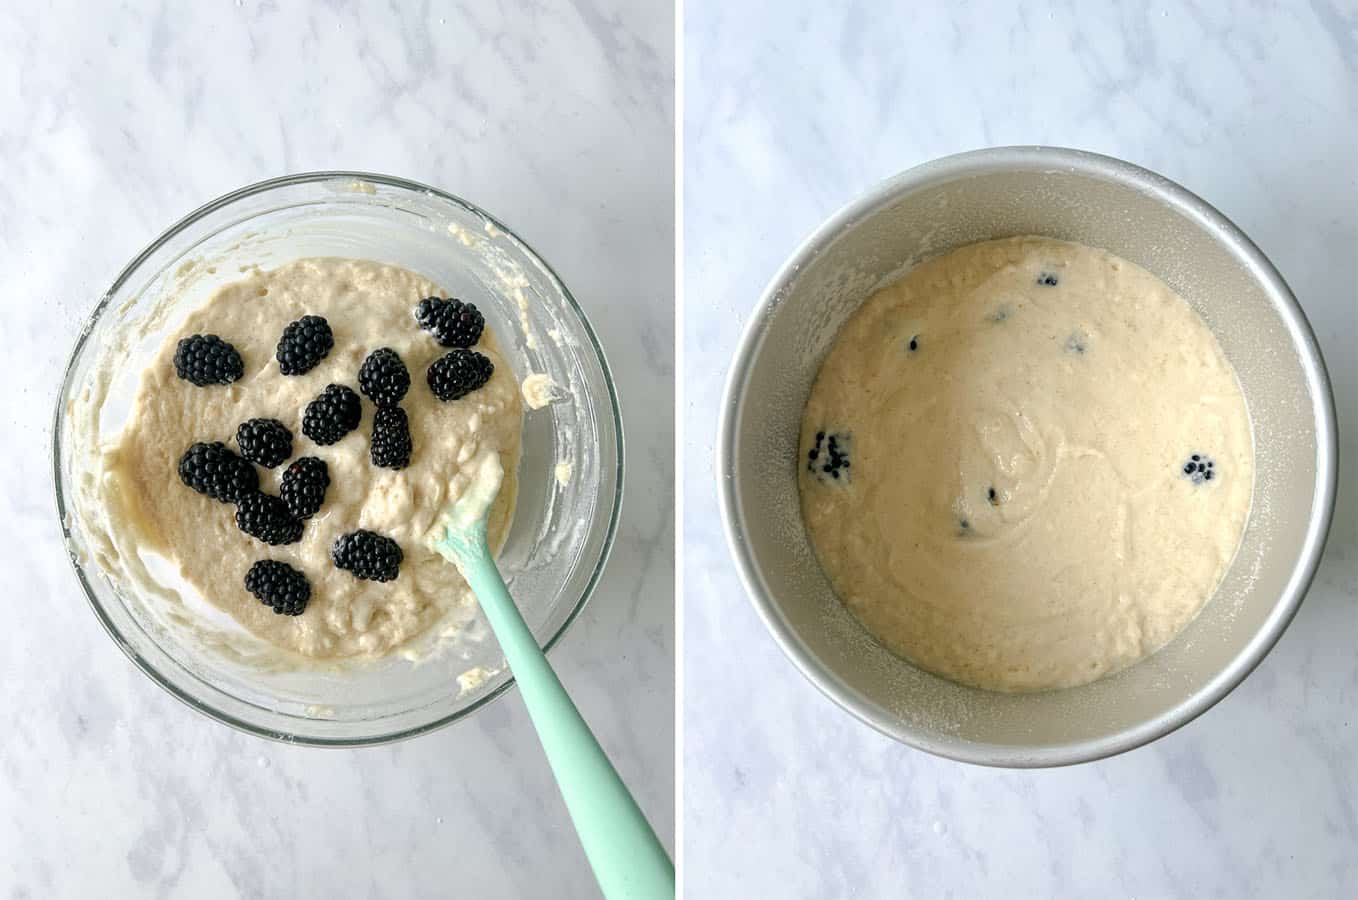
Place the pan in the center of the preheated oven and bake for approximately 50–60 minutes, or until the cake is golden brown and a toothpick inserted into the center comes out clean or with just a few moist crumbs attached.
Because every oven is slightly different, start checking the cake around the 45–50 minute mark.
If the top is browning too quickly while the center still needs more time, loosely cover the cake with a piece of aluminum foil and continue baking.
Try not to open the oven during the first 40 minutes, as a sudden change in temperature can cause the cake to sink.
Cool the cake completely
Remove the cake from the oven and let it cool in the pan for around 10–15 minutes. Carefully loosen the edges with a thin knife or spatula, then gently remove the cake from the pan and transfer it to a wire rack.
Allow the cake to cool completely before adding the cream.
This cake is particularly tender while warm, so handle it gently when transferring it to the rack. Avoid trying to slice, move, or decorate it while it’s still warm, as it can easily break.
If you have time, let the cake cool completely and then chill it for 30–60 minutes before decorating. A slightly chilled cake is easier to frost and decorate.
Make the homemade blackberry jam
While the cake cools, prepare the blackberry jam.
Add the blackberries, sugar, and lemon juice to a small saucepan. Cook over medium heat, stirring occasionally, until the berries break down and release their juices.
Continue cooking for approximately 10–15 minutes, stirring regularly, until the mixture thickens into a jam-like consistency.
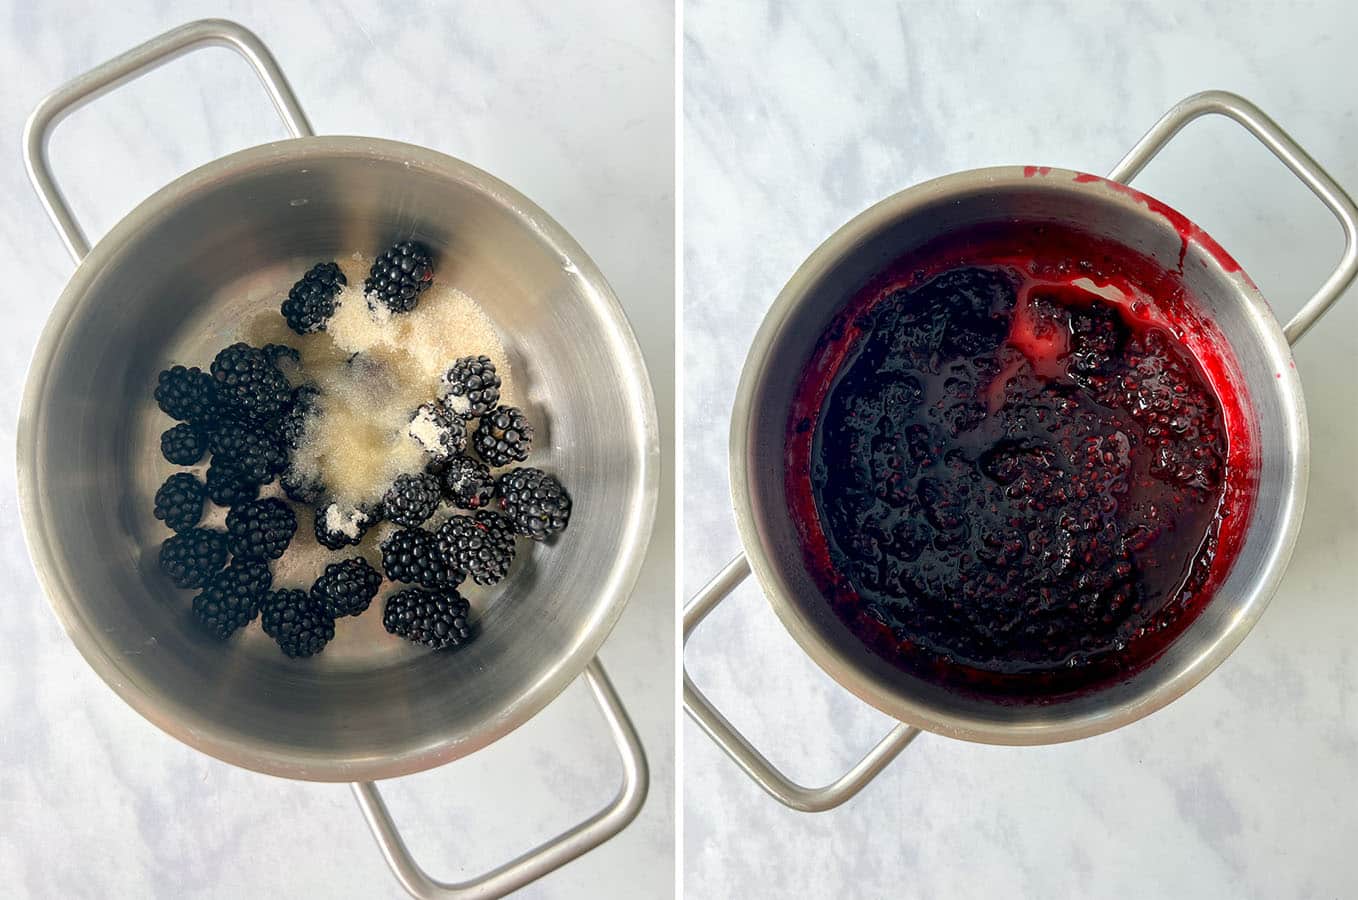
While the jam is still hot, pour it through a fine-mesh sieve into a clean bowl. Press the berries firmly with the back of a spoon or spatula to extract as much of the blackberry mixture as possible, leaving the seeds behind.
Let the strained jam cool completely.
Don’t worry if the jam seems slightly runny while hot; it will thicken as it cools. Avoid cooking it for too long, as an overly thick jam can make the cream difficult to spread or pipe.
For an especially smooth cream, make sure the jam is completely cold before mixing it into the frosting.
You can make the homemade jam up to 3 days ahead and keep it refrigerated, so it’s nicely cooled when mixing it with the cream in the next step!
Prepare the blackberry cream
Once the cake and blackberry jam are completely cool, prepare the cream.
Place the cream cheese and powdered sugar in a mixing bowl and beat until smooth and creamy.
In a separate chilled bowl, whip the whipping cream until it forms firm peaks. Be careful not to overwhip it, especially if using dairy cream.
Add the whipped cream to the cream cheese mixture a few spoonfuls at a time, gently folding after each addition. Continue until you have a smooth, light, and fluffy cream.
Finally, gently fold in the cooled blackberry jam until evenly incorporated and the cream takes on a beautiful blackberry color.
For the most stable cream, use cold cream cheese and whipping cream straight from the refrigerator. If your plant-based cream is very soft, chill the finished cream for 15–20 minutes before piping.
Decorate the cake
Transfer the blackberry cream to a piping bag fitted with your favorite piping tip.
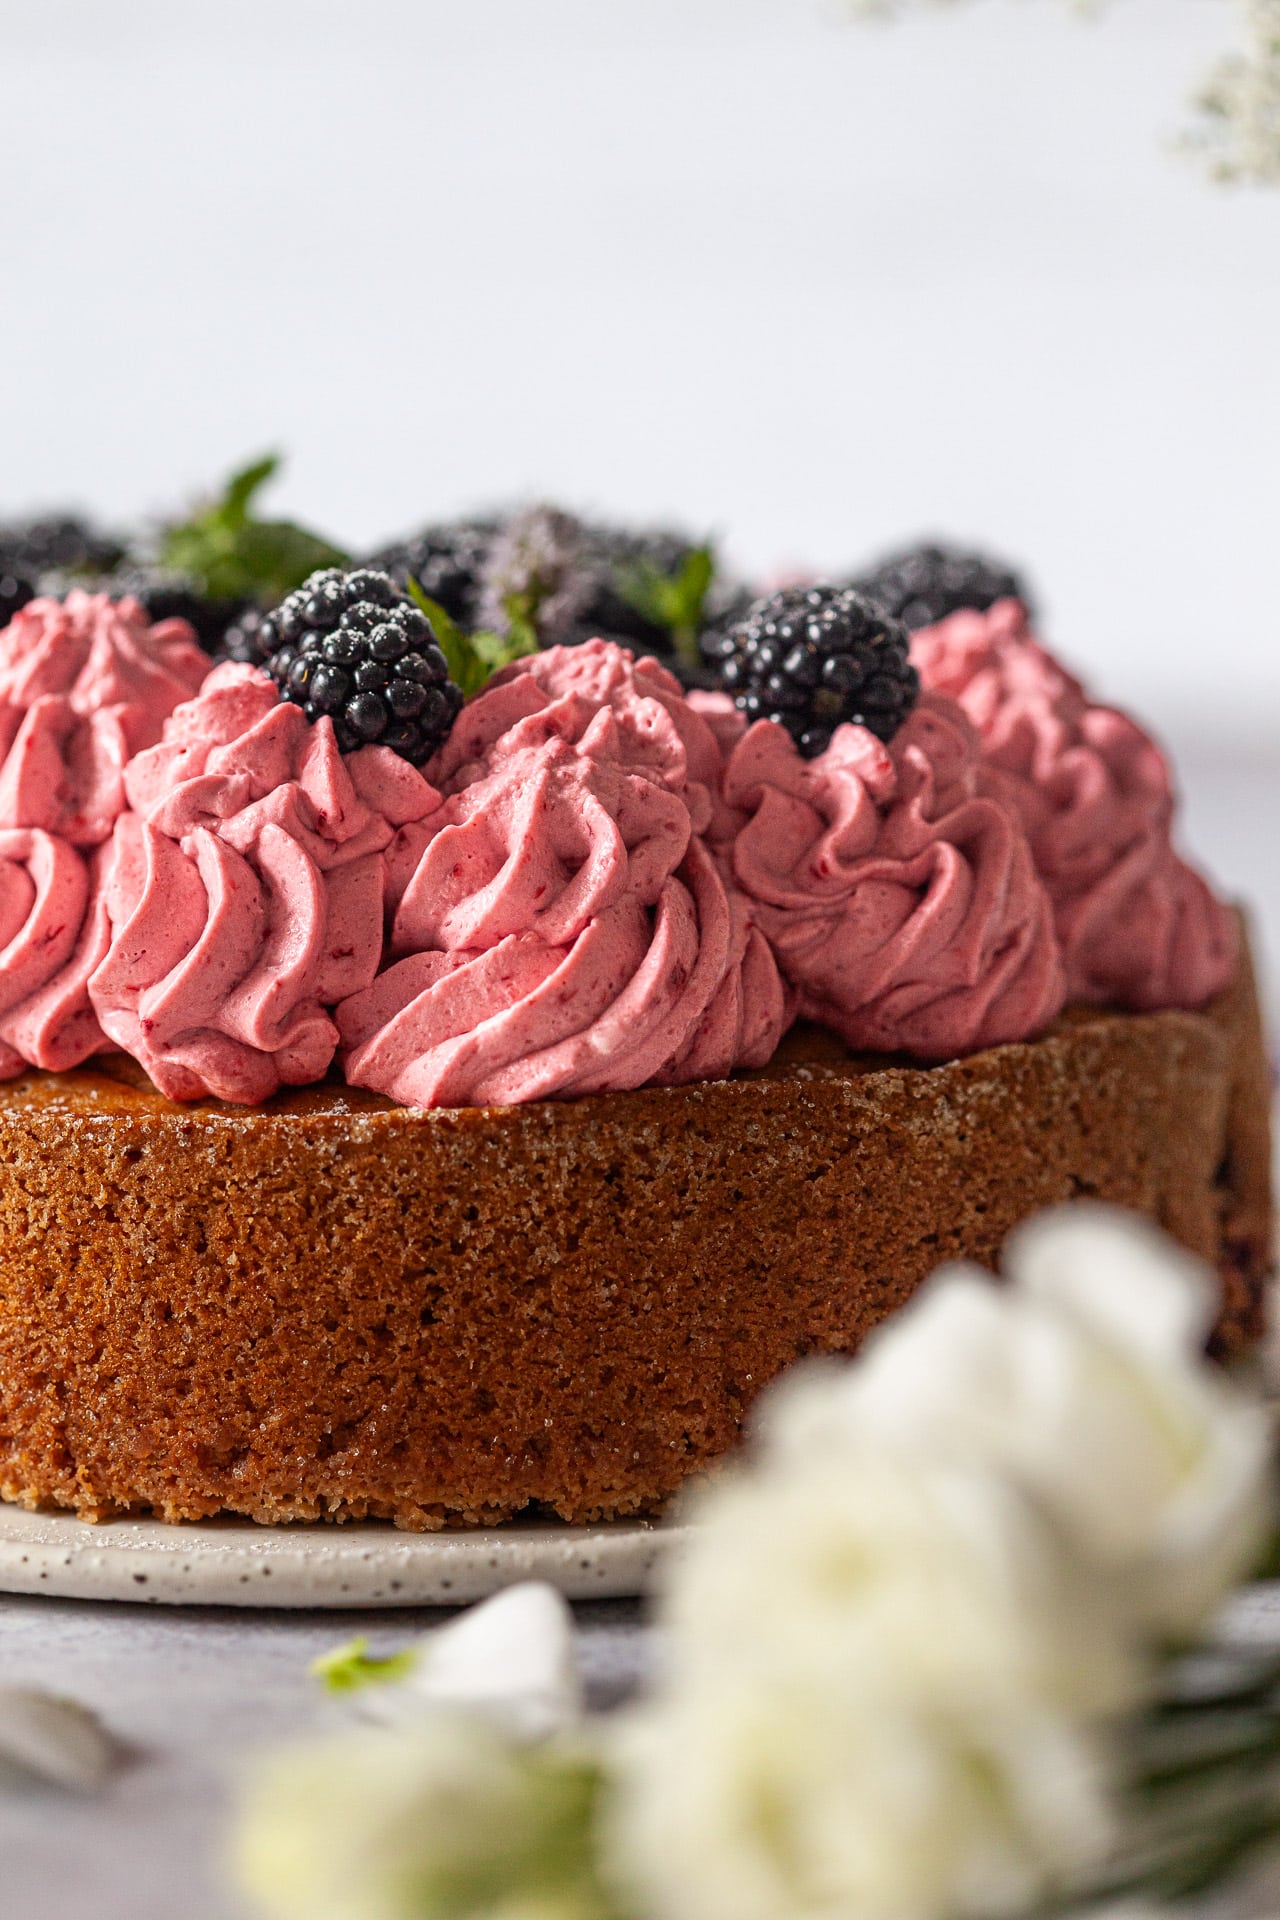
Pipe swirls, rosettes, or small peaks over the top of the completely cooled cake. You can cover the entire surface or simply create a generous border around the edges for a more rustic look.
Finish with fresh blackberries, arranging them over the cream as desired.
For an extra pretty finish, add a few small blackberry pieces or a light dusting of powdered sugar just before serving.
If the cream feels too soft to pipe, place it in the refrigerator for 15–30 minutes before decorating. Don’t add the fresh blackberries too far in advance if they are very juicy, as they can release moisture onto the cream.
Serving suggestion
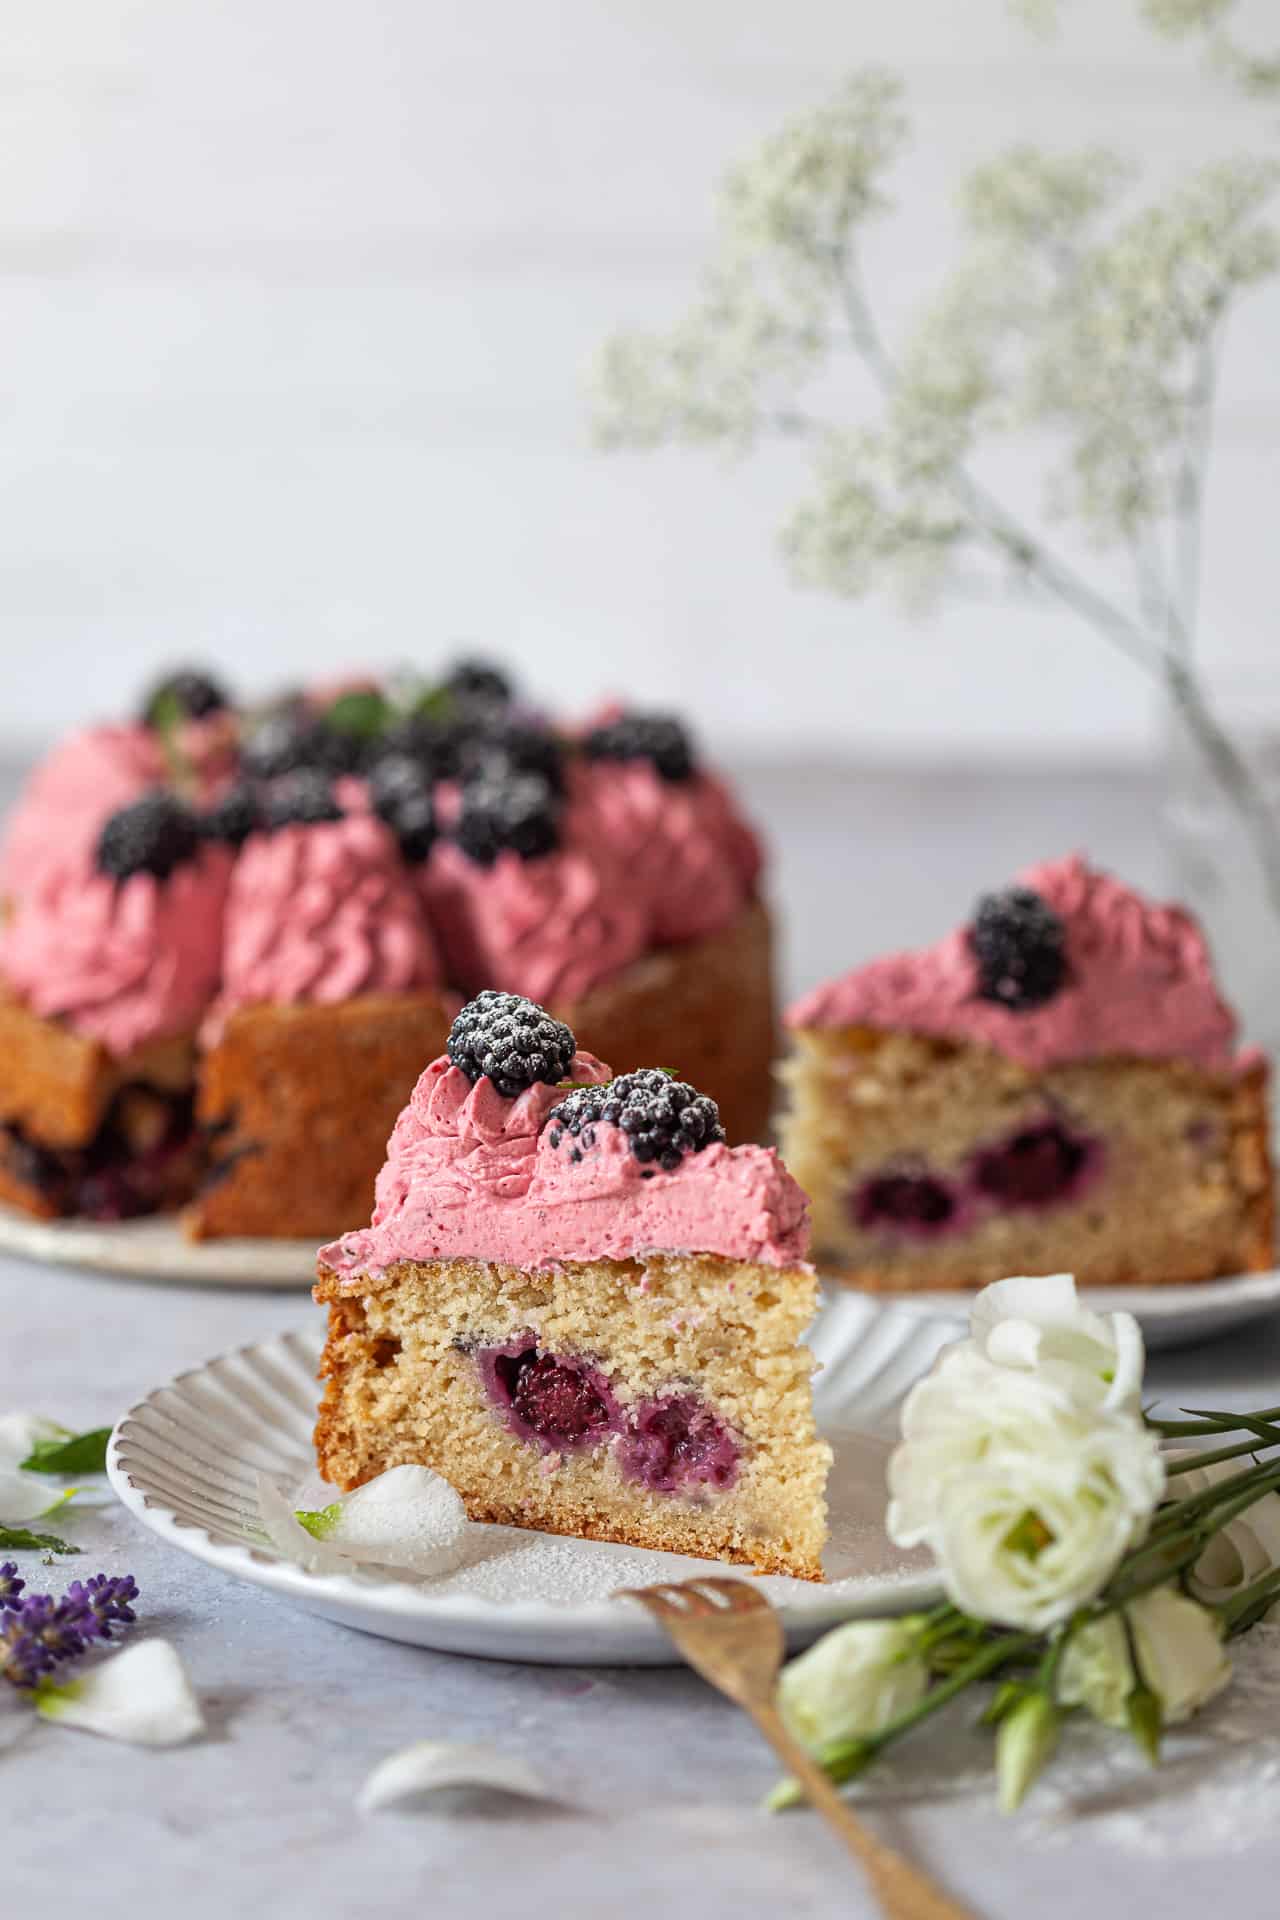
This blackberry yogurt cake is delicious on its own, but the creamy blackberry topping and fresh berries make it especially beautiful for summer gatherings.
For the best texture and flavor, refrigerate the finished cake for at least 30 minutes before serving. This allows the cream to set slightly, making the cake easier to slice.
Take the cake out of the refrigerator about 10–15 minutes before serving so the sponge and cream can soften slightly.
Slice with a sharp knife, wiping it clean between cuts for neat, beautiful slices.
Serve it chilled or slightly softened at room temperature for the best combination of a tender cake and creamy topping.
Storage tips
Because this cake is topped with a cream cheese and whipped cream frosting, it should be stored in the refrigerator. Keeping it properly chilled will help the cream stay firm and fresh while preserving the cake’s tender texture.
Refrigerate
Store the finished cake in an airtight cake container or loosely covered with plastic wrap in the refrigerator for up to 3 days.
Keeping the cake covered prevents the sponge from drying out and stops it from absorbing odors from other foods in the refrigerator.
Take the cake out of the refrigerator about 10–15 minutes before serving. This allows the sponge to soften slightly while keeping the cream nicely chilled.
If you’re preparing the cake ahead of time, decorate it with fresh blackberries shortly before serving. This helps prevent excess moisture from the berries from affecting the cream.
Make ahead
The sponge can be baked 1 day ahead and stored tightly wrapped at room temperature once completely cooled. Prepare the jam separately and refrigerate it in a covered container. Decorate the cake on the day you plan to serve it.
Freezing
The unfrosted sponge can be frozen for up to 2–3 months. Wrap it tightly in plastic wrap and place it in a freezer-safe container or bag. Thaw it completely in the refrigerator before decorating.
The finished cake with cream is best enjoyed fresh rather than frozen.
Similar recipes:
Vegan Yogurt Raspberry Loaf Cake
Strawberry Yogurt Cake {Dairy-Free}
This recipe is sponsored by Hofer Slovenija.
Easy Blackberry Yogurt Cake
We've added fresh blackberries to this delicious and tender yogurt cake and topped it with a wonderful cream and homemade blackberry jam. It's a straightforward recipe that is perfect for when blackberries are in season (but you can use frozen just as well!)
Ingredients
Sponge cake with a diameter of 20 cm:
- 350 grams of flour
- 120 grams of sugar
- 60 grams of brown sugar
- 1 teaspoon of baking powder
- 1 teaspoon of baking soda
- 1 teaspoon of salt
- 180 ml of vegan yogurt
- 180 ml of vegan milk
- 125 ml of oil
- 2 teaspoons of vanilla extract
- 1 tablespoon (20 ml) of apple cider vinegar
- 100 grams of blackberries
Blackberry jam:
- 150 grams of blackberries
- 50 grams of sugar
- 1 tablespoon of lemon juice
Cream:
- 150 grams of vegan cream cheese
- 300 ml of vegan whipping cream
- 1 tablespoon of powdered sugar
- Blackberry jam
Decoration:
- Fresh blackberries
Instructions
- Preheat the oven to 180°C (356°F). Lightly grease a round cake pan with a diameter of 20-22 cm and dust it with sugar.
- Make the spongecake: In a large bowl, combine flour, sugar, baking powder, baking soda, and salt. Mix well.
- In another bowl, mix the wet ingredients: yogurt, milk, oil, and vanilla extract. Add the wet ingredients to the dry ingredients and gently fold until there are no visible flour clumps, being careful not to overmix. Finally, add the apple cider vinegar and blackberries and gently fold them in with a spatula.
- Pour the batter into the prepared cake pan and place it in the preheated oven. Bake for 50-60 minutes, or until the cake is golden brown and a toothpick inserted into the center comes out clean.
- Remove the baked cake from the oven, let it cool in the pan, then carefully turn it out onto a wire rack and let it cool completely. Be cautious as the cake is delicate and fragile to prevent it from breaking.
- Prepare the jam: combine blackberries, sugar, and lemon juice in a pot. Heat over medium heat while stirring, until the blackberries dissolve and the mixture thickens, about 15 minutes. While still hot, strain the mixture through a fine sieve to remove seeds, then let the jam cool.
- Once the cake is completely cool, prepare the cream: whip the cream cheese with powdered sugar. Separately, whip the whipping cream and then fold it into the whipped cream cheese in spoonfuls. Finally, gently fold in the cooled jam.
- Pipe the cream onto the cake using a piping bag and decorate it. Lastly, add fresh blackberries on top.
Notes
Instead of blackberries, you can also use other berries like raspberries or blueberries!
Nutrition Information:
Yield: 12 Serving Size: 1Amount Per Serving: Calories: 277Total Fat: 7gSaturated Fat: 4gUnsaturated Fat: 4gCholesterol: 18mgSodium: 425mgCarbohydrates: 48gFiber: 2gSugar: 23gProtein: 6g
Nutrition data is automatically calculated using Nutritionix and may not be accurate.